Setting Up Active Directory
How to build a local Active Directory lab for penetration testing practice using the PNPT methodology by TCM Security. Includes Windows Server 2022 and Windows 10 setup.

Setting Up Active Directory
‼️This is a setup for Penetration Testing in Local Network and never meant for production.
At first Download ISOs
Setup Domain Controller
- NEW VM
- Typical
- Server ISO
- Split
- Make sure its 60 GB
- Finish
- Edit
- Add 8GB RAM
- Remove Floppy Drive (Recommended)
Install
- Next > Install Now
- Standard Evaluation Desktop Experience
- Custom Install
- New > Default > Apply > Ok
- Next
- Done
- For This purpose set easy password
P@$$w0rd! - Login
- Install VMWare Tools
- VM > Install VMWare tool
- Open This PC > Open ISO
- Install
SERVER CONFIGURATION (ADDS)
- Change Hostname
- Start Menu > Name > Rename This PC
- HYDRA-DC
- Reboot.
- Make this a Domain Controller
- Manage > Add Roles and Feature
- Role-based or Feature-based install > Next
- HYDRA-DC > Next
- Server Roles > ✅Active Directory Domain Services (ADDS) > Add Features > Next
- Next
- Next
- Restart Auto if required
- Install
- Promote This Server to Domain Controller
- Add a new forest
- Root Domain:
marvel.local> Next - Functional Level: 2016
- Same password for Admin Account > Next > Next
- Loads netbios Automatically > Next
- Next to last > Install
- Certificates Services
- Manage
- Add roles and Feature
- Role Based Feature
- Next to Features
- Role Based Features
- Active Directory Certificate Services (Used to verify ID in domain controller) (Allows us to use LDAP)
- Add Features > Next to AD CS Role Services
- ✅ Certificate Authority > Next
- ✅ Restart if Needed
- Install
- Configure Certificates Services
- Flag > Configure AD CS
- ✅ Certification AUthority > Next
- Private Key > Create New pvt key
- Default Next to Validity
- 99 years
- Default > Configure
- Manage > Add Roles and Feature
DC
ip: 192.168.135.131 administrator:P@$$w0rd!
CLIENT SETUP
Setup 2 OS at same Time
- Download WIndows 10 Enterprise ISO
VM Setup
- Open VMWARE
- Create new VM
- select Downloaded ISO
- Windows 10 Enterprise > Next > Yes (Without product key)
- Name: THE PUNISHER > Next
- SIZE 60 GB > Finish
- Customize > Remove Floppy, Adjust RAM 8 GB Cpu 4 > OK
- Power On and Hit any key and move to second VM do same, different name
OS SETUP
(SIMALTANEOUSLY)
- Power On Both Machines
- Press key to continue
- Install Now > Accept Terms > Custom > Next to install
- RESTART
- US > YES > US > YES > SKIP
- Domain Join Instead
- Punisher VM =
frankcastlepassword=Password1 - Spiderman VM =
peterparkerpassword = `Password1 - All Questions Answered BOB
- Disable all tracking > Not Now to Cortana
- WAIT
- INSTALL VMWARE TOOLS
- Change Hostname > THEPUNISHER & SPIDERMAN
SETTING UP USERS, GROUPS and POLICIES
SERVER
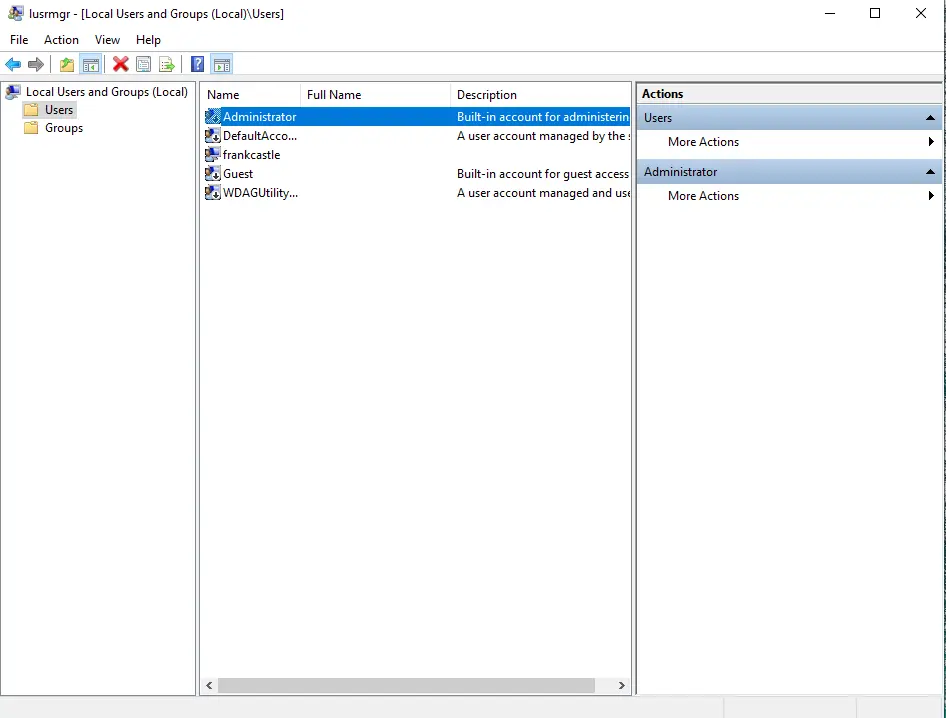
USER Setup
- Server Manager
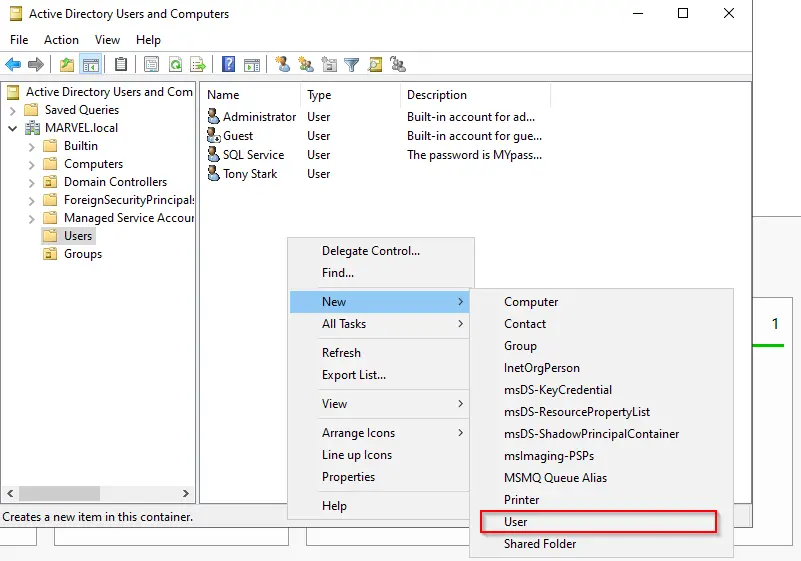
- Tools > AD Users and Computers
- Manage User Groups
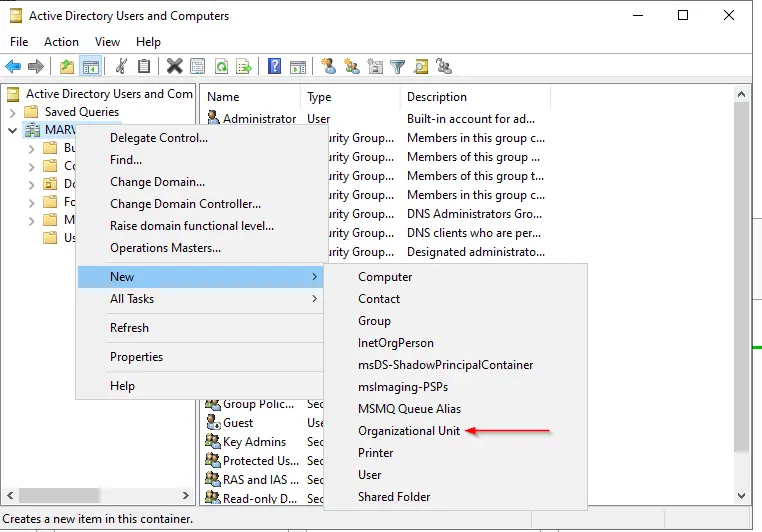
- MARVEL.local ( Domain Controller) > Right Click >New > OU
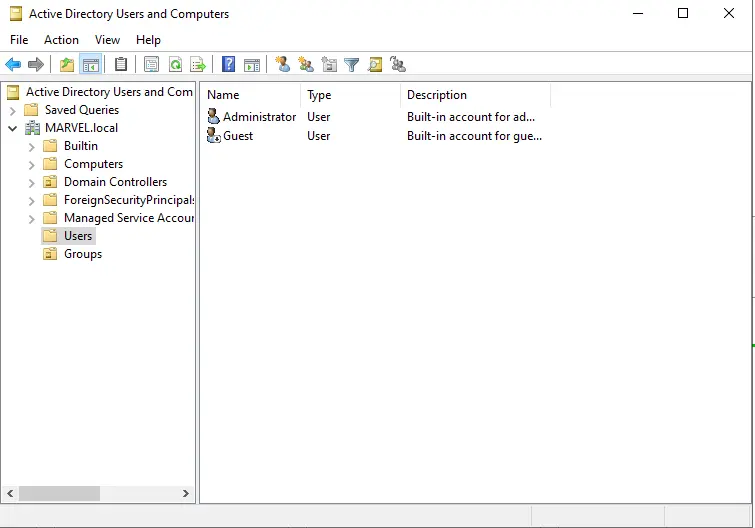
- Move Everything Except
AdminandGuestto NewGroups> YES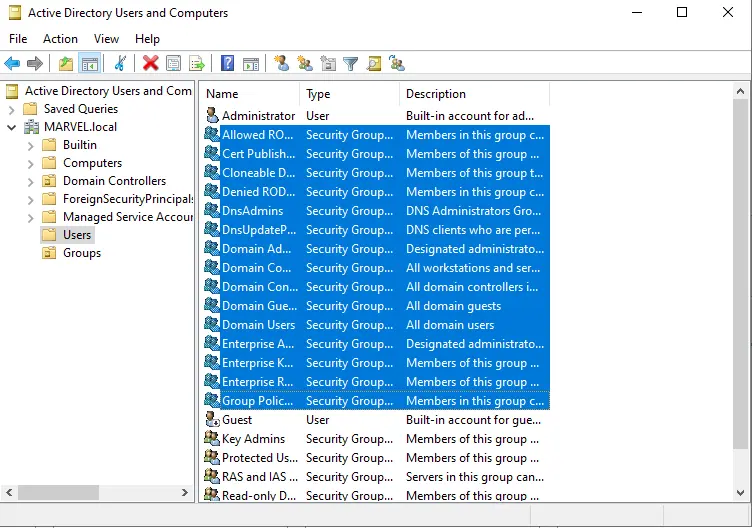
- MARVEL.local ( Domain Controller) > Right Click >New > OU
- Create Another
Administrator- Copy current
Administrator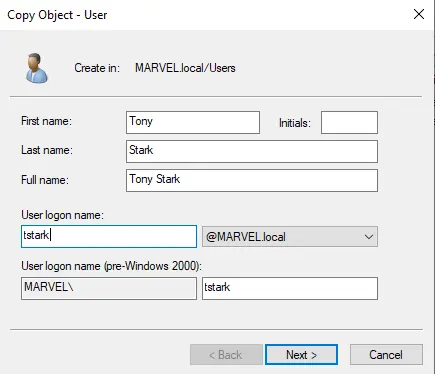
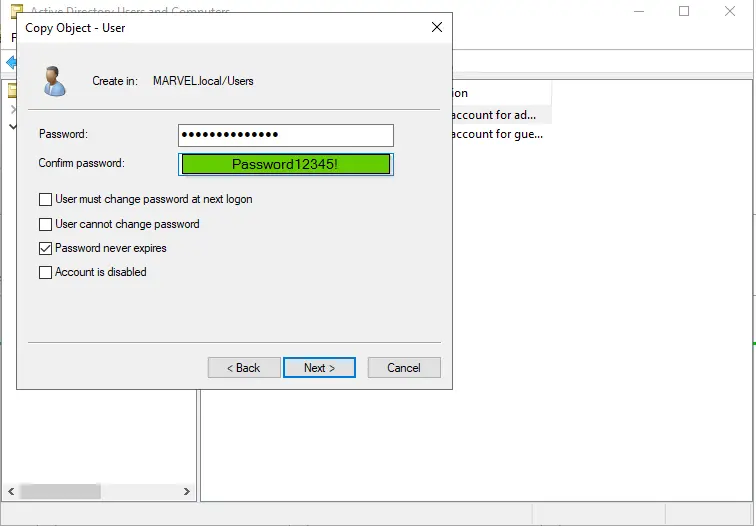
- Copy current
- Create a Service account
- Name: SQL Service Password: MYpassword123# (Weak pw with complexity and character count for lab purpose)
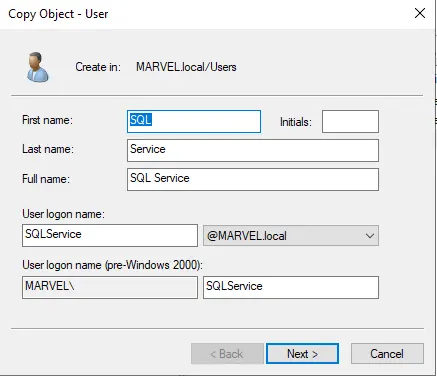
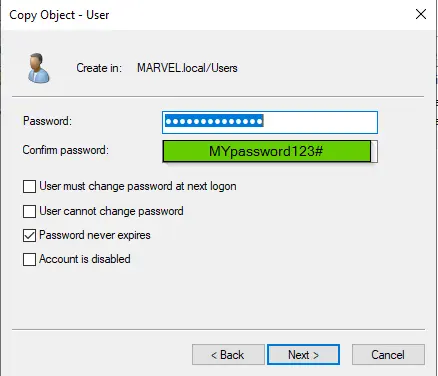
- Name: SQL Service Password: MYpassword123# (Weak pw with complexity and character count for lab purpose)
- Create Two New Users
- Right Click > New > User
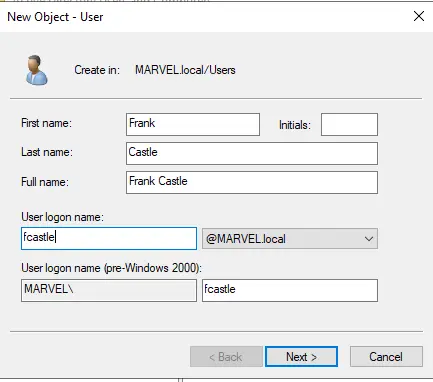
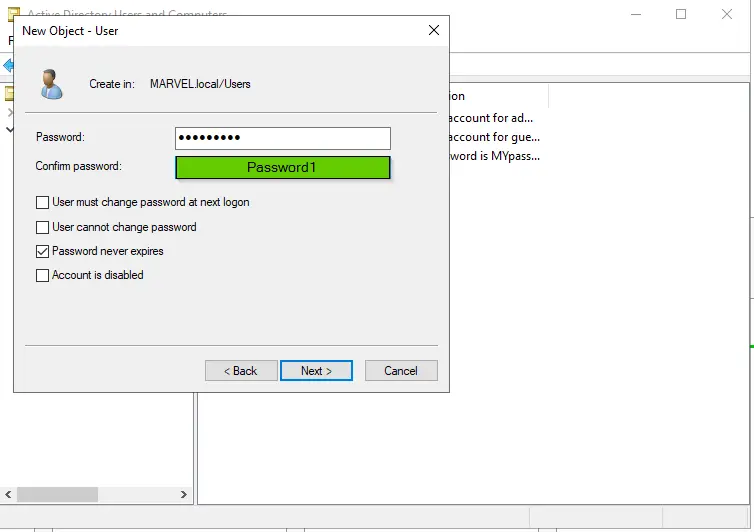
- For Second User copy recently created user and change Names
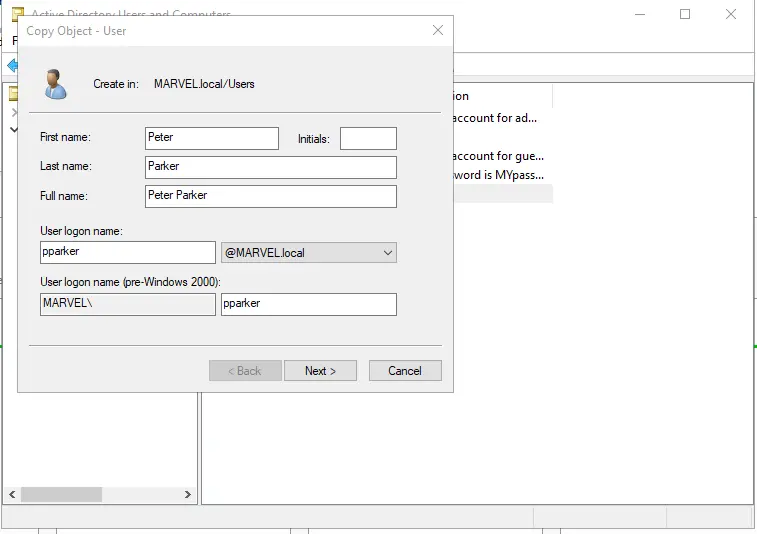
- Right Click > New > User
File Sharing To Exploit Later
- Server Manager
- File Share and Storage
- Shares > Tasks > New Shares
- SMB Share Quick > Next
- C: is fine > Next
- Name:
hackme - ✅Allow Caching > Next
- Permission > Next
- Create
SETUP Service Account Fully
- Open Command prompt as Admin
setspn -a HYDRA-DC/SQLService.MARVEL.local:60111 MARVEL\SQLService- Check with
setspn -T MARVEL.local -Q */*
Setup Group Policy
- Start Menu > Group Policy Management
- Forest > Domains
- Right Click MARVEL.local > Create a GPO in this domain and Link it here
- Name: Disable Windows Defender > Ok
- Edit Newly created Policy i.e
Disable Windows Defender- Computer Config > Policies > > Admin Templates > Windows Components > Microsoft Defender Antivirus
- Double Click Turn Off Microsoft Defender Antivirus
- Enabled > Apply
- Right Click > Enforced
Setup Static IP Address
- Right Click Network on Taskbar
- Open Network Internet Settings
- Change Adapter options
- Ethernet0
- Properties > IPV4 > Use Following (acquired form
ipconfig)- IP: 192.168.135.137 (current ip from ipconfig)
- Subnet Mask: 255.255.255.0
- Gateway: 192.168.135.2
- Ok
Join Machine To Domains
- Login to Client Machines
- Make IP Addresses Static
- Change Preferred DNS server to Domain Controller’s IP i.e. 192.168.135.137
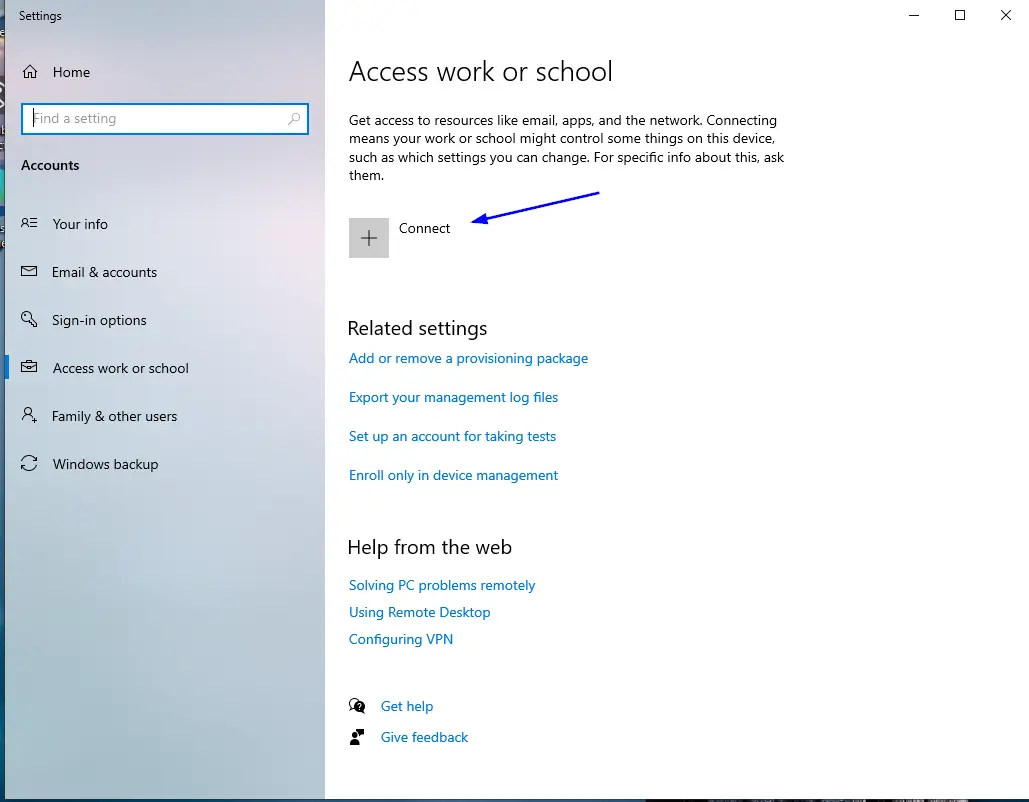
Make Client devices Join the Domain
- Start Menu
- Access Work or School
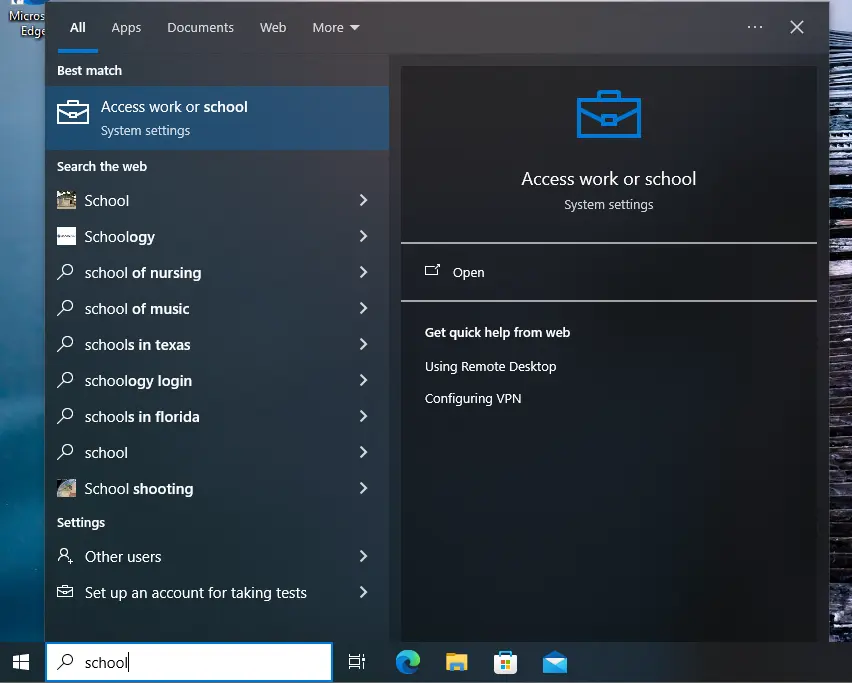
- Connect
- Join this device to a local Active Directory Domain
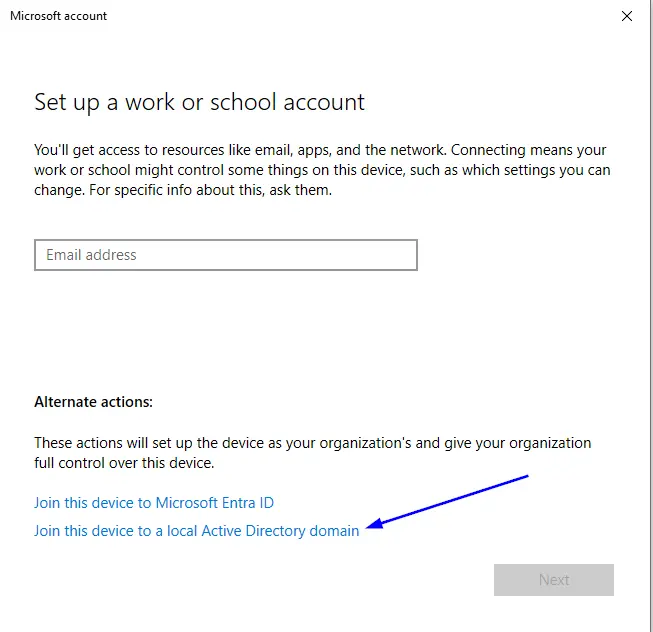
- Set it as
MARVEL.local - Enter your Domain Controller Username and Password and ENTER
- We can Add as Administrator
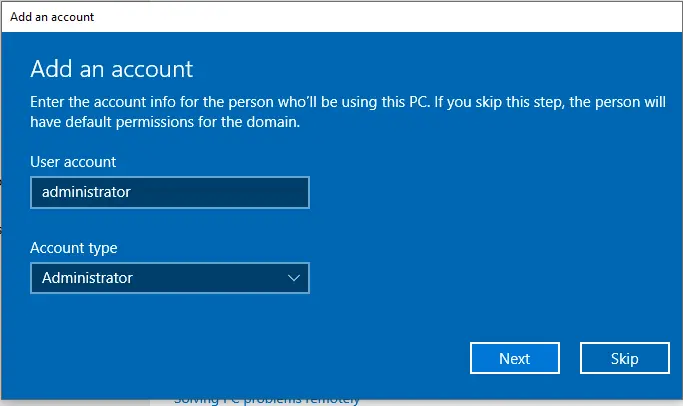
- Restart Now
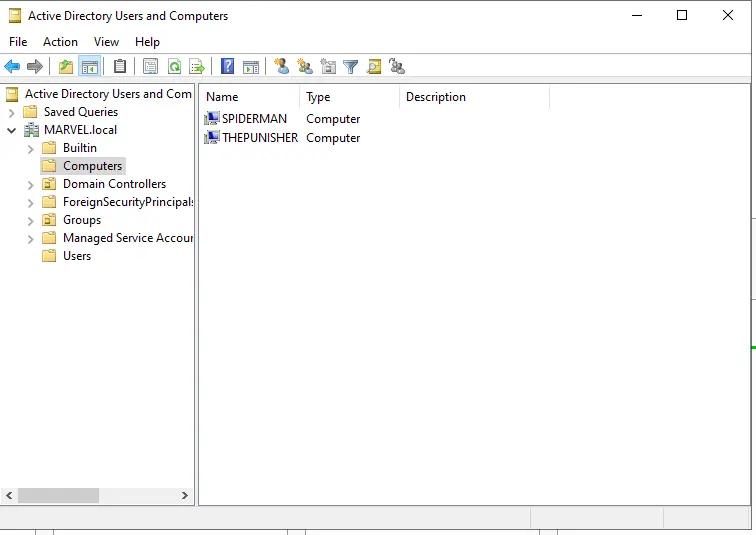
- Verify If you Joined Domain
- Server Manager > Tools > AD Users and Computers
- Computers > You will see both your Devices
- Open CLient Login with MARVEL\administrator
Modify Local Users for Client Machines
Enable Local Admin
- Start > Users > Edit Local Users and Groups
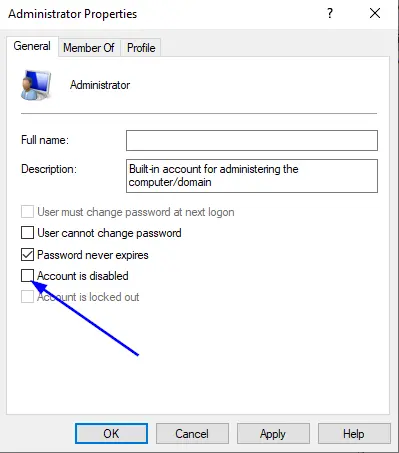
- Users > Administrator > Enable
- Set Password (Password1!)
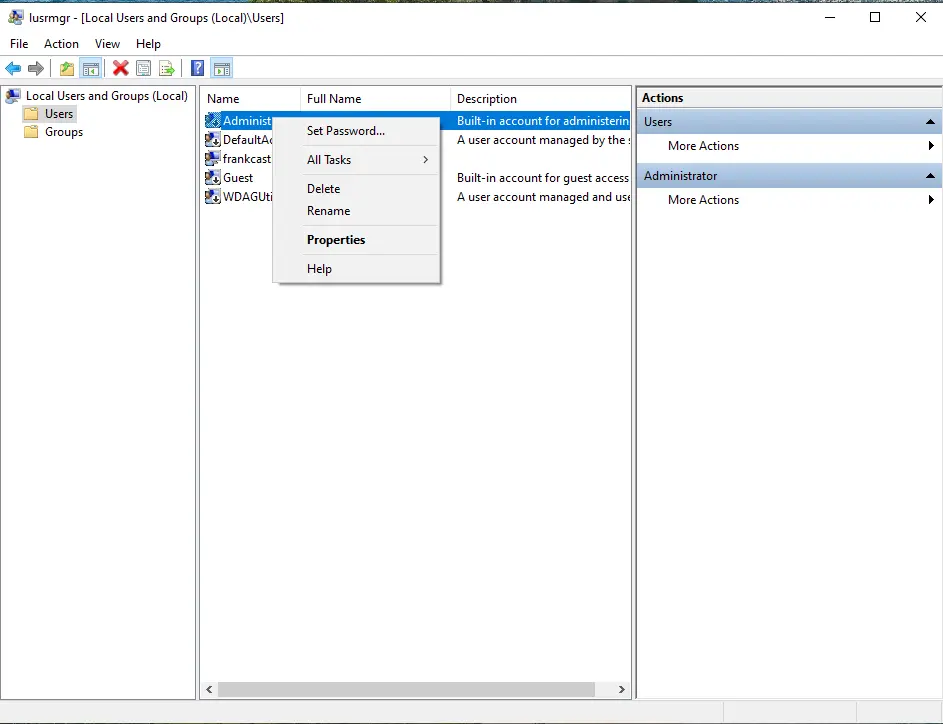
- Uncheck Account is Disabled > Apply > OK
Add Other Administrators
- Start > Users > Edit Local Users and Groups
Groups > Administrators > Add > Search
fcastle> Check Names > OK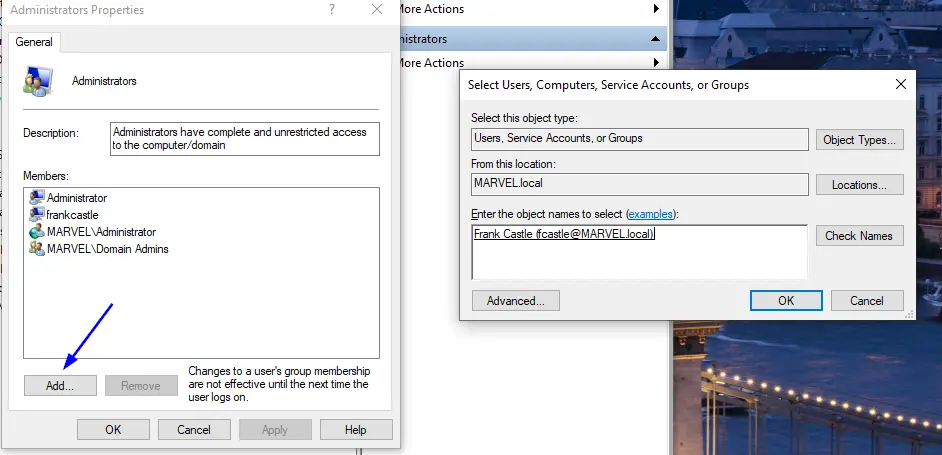
Logout and Check Local Account
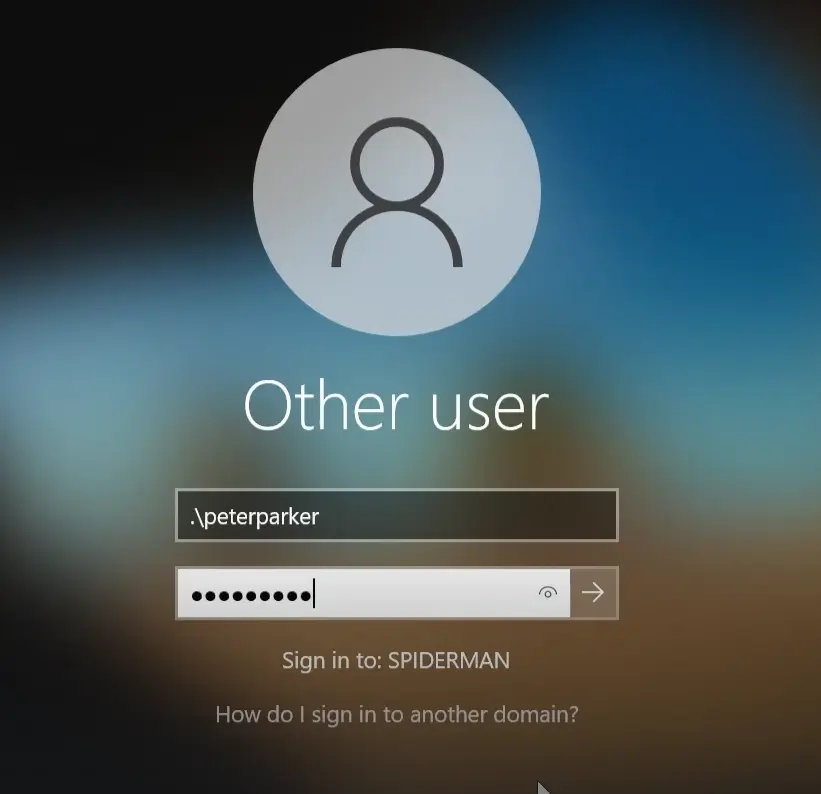
- Other Users
.\peterparker Password1 - Map Network Drive > Z:
- Folder >
\\HYDRA-DC\hackme| Connect using Different Credentials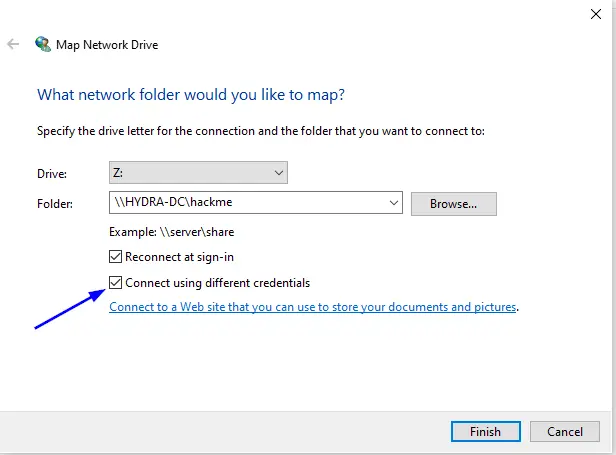
- Use Credentials username:
administratorpassword:Pa$$w0rd!
SPIDERMAN
ip: 192.168.135.134 peterparker:Password1
local: peterparker
THEPUNISHER
ip: 192.168.134.135 frankcastle:Password1
local frankcastle:Password123
Admins [email protected] pw: Password12345!
SQL Service Password is MYpassword123#
Domain Controller IP > 192.168.135.137
TO sign IN
This post is licensed under CC BY 4.0 by the author.