<?xml version="1.0" encoding="utf-8"?><feed xmlns="http://www.w3.org/2005/Atom" xml:lang="en"><generator uri="https://jekyllrb.com/" version="4.4.1">Jekyll</generator><link href="https://ashishghimire.com/feed.xml" rel="self" type="application/atom+xml" /><link href="https://ashishghimire.com/" rel="alternate" type="text/html" hreflang="en" /><updated>2026-05-13T14:19:48+10:00</updated><id>https://ashishghimire.com/feed.xml</id><title type="html">Ashish Ghimire</title><subtitle>Ashish Ghimire&apos;s blog on homelab, cybersecurity, self-hosting, and IT. Walkthroughs, writeups, and hands-on guides for Linux, Docker, Proxmox, networking, and more.</subtitle><entry><title type="html">OPNsense Logging to Grafana via Loki: Three Gotchas That Will Catch You</title><link href="https://ashishghimire.com/posts/opnsense-logging-loki-grafana/" rel="alternate" type="text/html" title="OPNsense Logging to Grafana via Loki: Three Gotchas That Will Catch You" /><published>2026-04-21T23:00:00+10:00</published><updated>2026-04-21T23:00:00+10:00</updated><id>https://ashishghimire.com/posts/opnsense-logging-loki-grafana</id><content type="html" xml:base="https://ashishghimire.com/posts/opnsense-logging-loki-grafana/"><![CDATA[<blockquote class="prompt-info">
  <p>
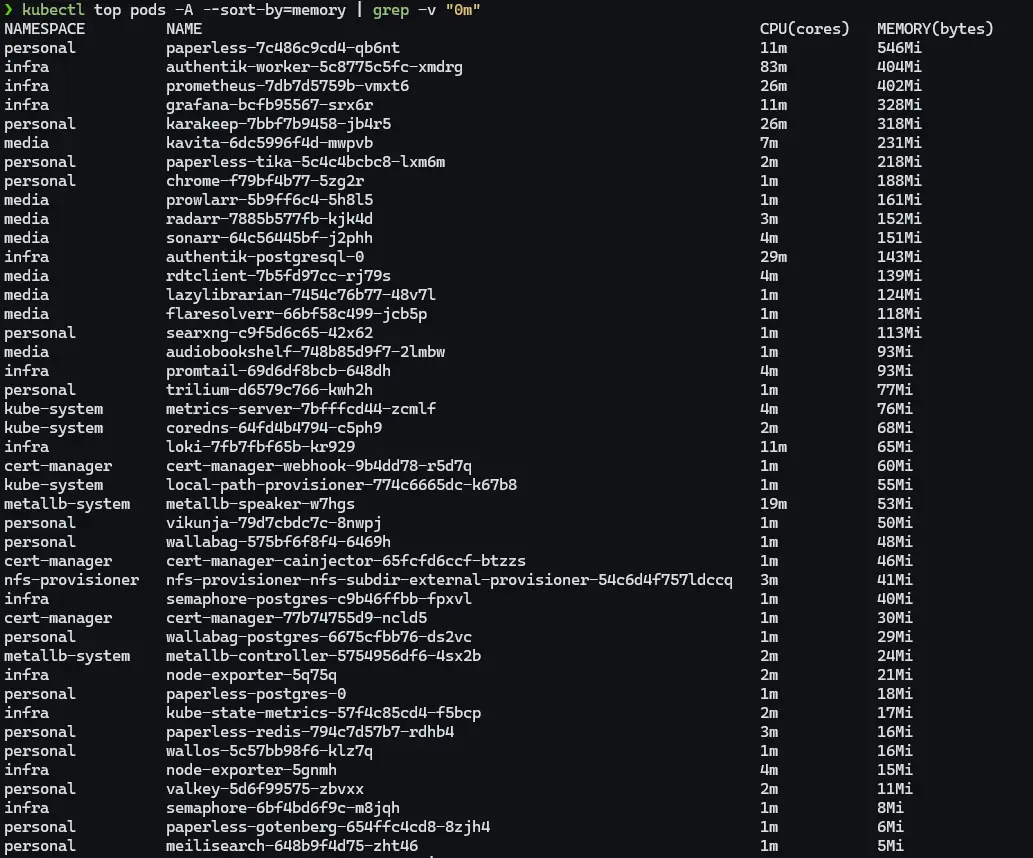
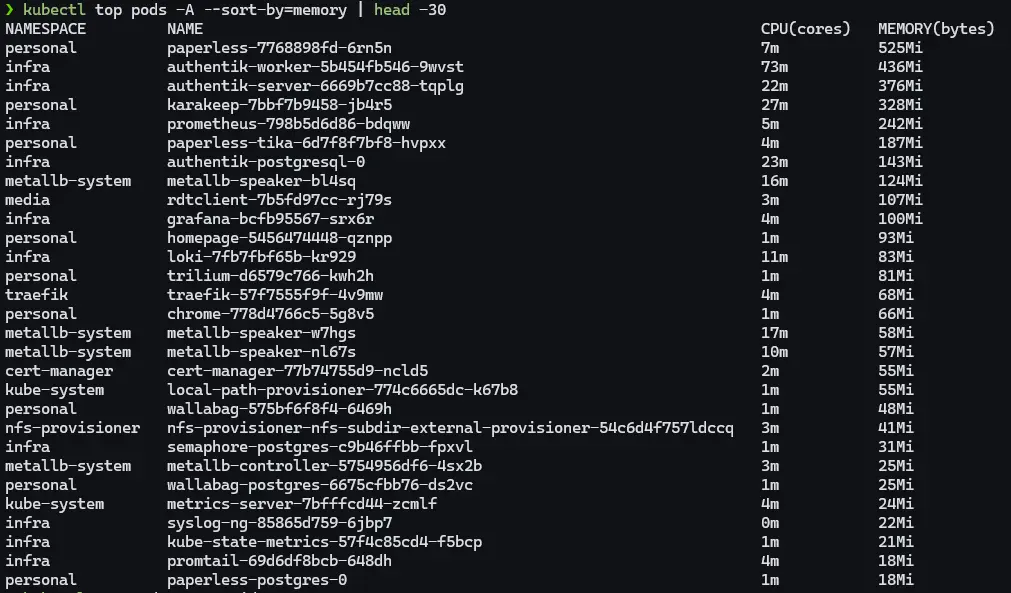
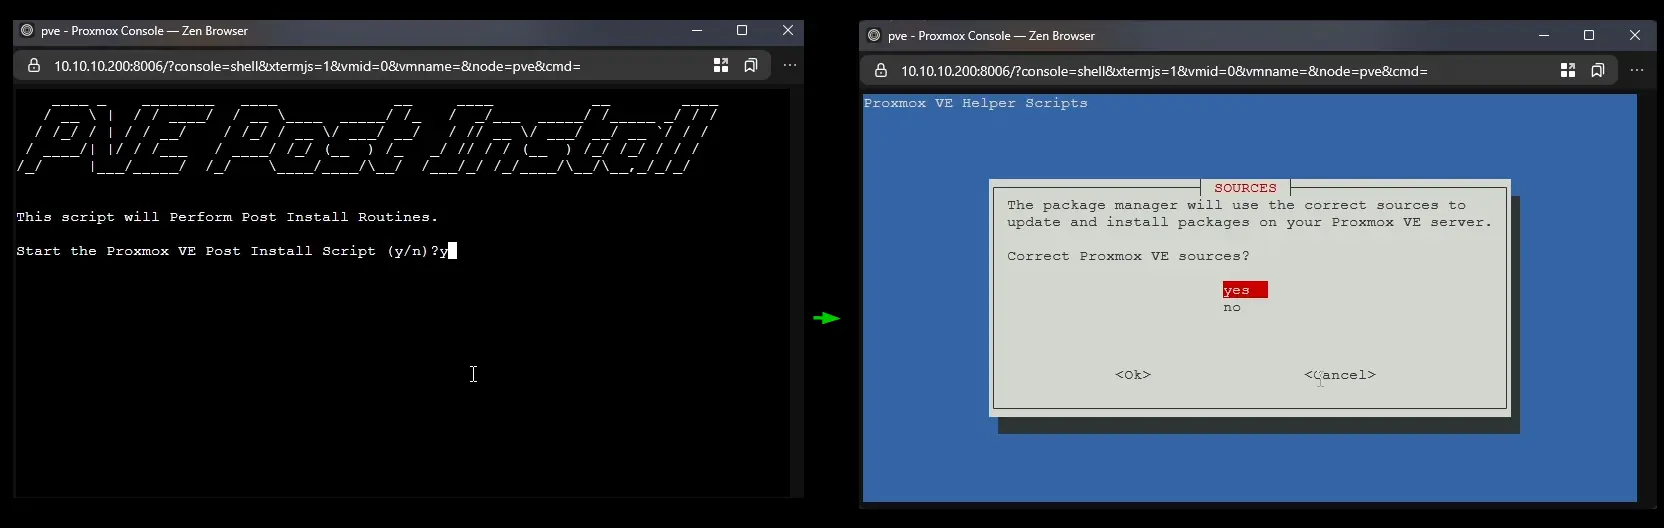
I run this entire stack on a k3s cluster at home. syslog-ng, Promtail, Loki, and Grafana are all deployed as Kubernetes workloads in the <code class="language-plaintext highlighter-rouge">infra</code> namespace. If you are running this on bare Docker or a single VM, some of the specifics will differ but the problems are the same.</p>
</blockquote>

<p>
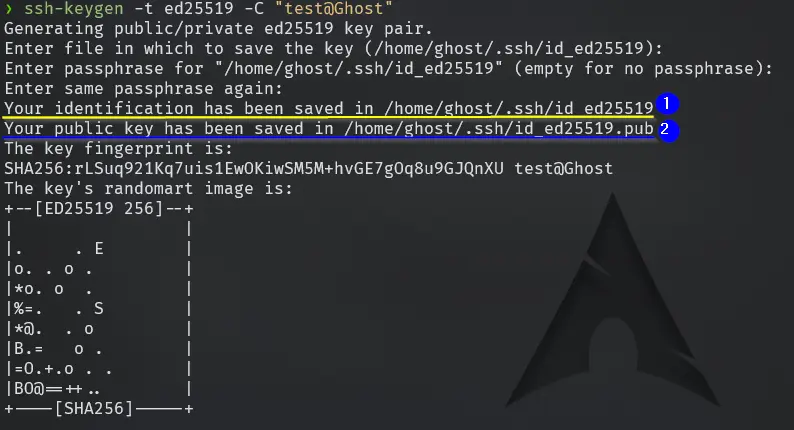
So I set up the whole logging pipeline. OPNsense sending syslog to syslog-ng, syslog-ng writing to a file, Promtail tailing that file and pushing to Loki, Grafana on the other end showing everything. Ticked it off the list. Done.</p>

<p>Except nothing was working. Zero logs. I just never actually checked.</p>

<p>When I finally went to look, I found three separate problems. None of them threw an error. None of them told me anything was wrong. The pipeline just sat there silently doing nothing.</p>

<p>Here is what they are, so you do not have to find them yourself.</p>

<h2 id="the-pipeline">The Pipeline</h2>

<p>Before we get into what breaks, here is what we are building:</p>

<div class="language-plaintext highlighter-rouge"><div class="highlight"><pre class="highlight"><code><table class="rouge-table"><tbody><tr><td class="rouge-gutter gl"><pre class="lineno">1
2
3
4
5
6
</pre></td><td class="rouge-code"><pre>OPNsense
  └─ UDP syslog → syslog-ng (LoadBalancer IP, port 1514)
       └─ writes to file on PVC
            └─ Promtail (tails file, parses filterlog)
                 └─ pushes to Loki
                      └─ Grafana queries Loki
</pre></td></tr></tbody></table></code></pre></div></div>

<p>syslog-ng sits in Kubernetes and receives raw syslog from OPNsense. Promtail tails the file syslog-ng writes. Loki stores it. Grafana shows it. Simple enough. Let’s see how it breaks.</p>

<h2 id="gotcha-1-syslog-ng-needs-a-loadbalancer-not-clusterip">Gotcha 1: syslog-ng Needs a LoadBalancer, Not ClusterIP</h2>

<p>OPNsense lives on your LAN. It is not inside Kubernetes. When it sends a UDP syslog packet somewhere, that IP needs to be actually reachable from your network.</p>

<p><code class="language-plaintext highlighter-rouge">ClusterIP</code> is only reachable from inside the cluster. So if your syslog-ng Service is <code class="language-plaintext highlighter-rouge">ClusterIP</code>, every single packet OPNsense sends just disappears. No error on the OPNsense side. No dropped message anywhere. It looks like everything is configured correctly and nothing arrives.</p>

<div class="language-yaml highlighter-rouge"><div class="highlight"><pre class="highlight"><code><table class="rouge-table"><tbody><tr><td class="rouge-gutter gl"><pre class="lineno">1
2
3
4
5
6
7
8
9
10
11
12
13
</pre></td><td class="rouge-code"><pre><span class="na">apiVersion</span><span class="pi">:</span> <span class="s">v1</span>
<span class="na">kind</span><span class="pi">:</span> <span class="s">Service</span>
<span class="na">metadata</span><span class="pi">:</span>
  <span class="na">name</span><span class="pi">:</span> <span class="s">syslog-ng</span>
  <span class="na">namespace</span><span class="pi">:</span> <span class="s">infra</span>
<span class="na">spec</span><span class="pi">:</span>
  <span class="na">type</span><span class="pi">:</span> <span class="s">LoadBalancer</span>   <span class="c1"># not ClusterIP</span>
  <span class="na">ports</span><span class="pi">:</span>
    <span class="pi">-</span> <span class="na">port</span><span class="pi">:</span> <span class="m">1514</span>
      <span class="na">targetPort</span><span class="pi">:</span> <span class="m">1514</span>
      <span class="na">protocol</span><span class="pi">:</span> <span class="s">UDP</span>
  <span class="na">selector</span><span class="pi">:</span>
    <span class="na">app</span><span class="pi">:</span> <span class="s">syslog-ng</span>
</pre></td></tr></tbody></table></code></pre></div></div>

<p>If you have MetalLB running, changing to <code class="language-plaintext highlighter-rouge">LoadBalancer</code> gives you a real IP on your LAN. That is the IP you put into OPNsense.</p>

<div class="language-bash highlighter-rouge"><div class="highlight"><pre class="highlight"><code><table class="rouge-table"><tbody><tr><td class="rouge-gutter gl"><pre class="lineno">1
2
</pre></td><td class="rouge-code"><pre>kubectl get svc syslog-ng <span class="nt">-n</span> infra
<span class="c"># look at the EXTERNAL-IP column</span>
</pre></td></tr></tbody></table></code></pre></div></div>

<p>
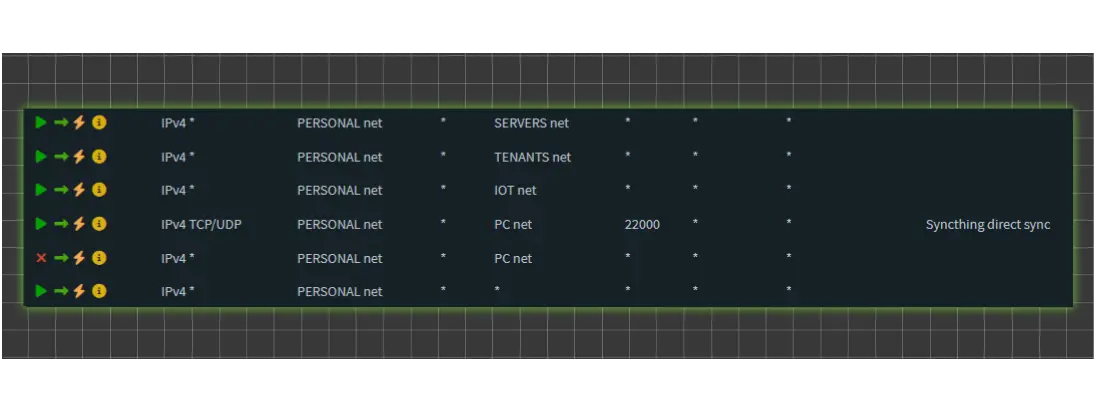
Then in OPNsense go to System, Settings, Logging / Targets. Transport UDP, host set to that external IP, port 1514.</p>

<blockquote class="prompt-tip">
  <p><strong>Tip:</strong> If EXTERNAL-IP stays as <code class="language-plaintext highlighter-rouge">&lt;pending&gt;</code> forever, MetalLB either is not running or has no IP pool configured for that range.</p>
</blockquote>

<h2 id="gotcha-2-promtail-does-not-listen-for-syslog">Gotcha 2: Promtail Does Not Listen for Syslog</h2>

<p>This one surprised me because it seems like it should work.</p>

<p>I had syslog-ng configured to forward logs to Promtail over UDP. Seemed reasonable. syslog-ng forwards, Promtail receives. Nope.</p>

<p>Promtail does not receive syslog. That is not what it does. Promtail tails files, reads new lines, pushes to Loki. It has no UDP listener, no syslog receiver. So this destination in syslog-ng was sending packets into nothing:</p>

<div class="language-plaintext highlighter-rouge"><div class="highlight"><pre class="highlight"><code><table class="rouge-table"><tbody><tr><td class="rouge-gutter gl"><pre class="lineno">1
2
3
4
5
6
7
8
</pre></td><td class="rouge-code"><pre>destination d_promtail {
  syslog(
    "promtail.infra.svc.cluster.local"
    transport("udp")
    port(1514)
    flags(syslog-protocol)
  );
};
</pre></td></tr></tbody></table></code></pre></div></div>

<p>How it actually works is simpler. syslog-ng writes to a file on a PVC. Promtail mounts that same PVC and tails the file. That is the whole relationship.</p>

<div class="language-plaintext highlighter-rouge"><div class="highlight"><pre class="highlight"><code><table class="rouge-table"><tbody><tr><td class="rouge-gutter gl"><pre class="lineno">1
2
3
4
</pre></td><td class="rouge-code"><pre>log {
  source(s_opnsense);
  destination(d_local);   # writes to /var/log/opnsense/opnsense.log
};
</pre></td></tr></tbody></table></code></pre></div></div>

<div class="language-yaml highlighter-rouge"><div class="highlight"><pre class="highlight"><code><table class="rouge-table"><tbody><tr><td class="rouge-gutter gl"><pre class="lineno">1
2
3
4
5
6
7
</pre></td><td class="rouge-code"><pre><span class="na">scrape_configs</span><span class="pi">:</span>
  <span class="pi">-</span> <span class="na">job_name</span><span class="pi">:</span> <span class="s">opnsense</span>
    <span class="na">static_configs</span><span class="pi">:</span>
      <span class="pi">-</span> <span class="na">targets</span><span class="pi">:</span> <span class="pi">[</span><span class="nv">localhost</span><span class="pi">]</span>
        <span class="na">labels</span><span class="pi">:</span>
          <span class="na">job</span><span class="pi">:</span> <span class="s">opnsense</span>
          <span class="na">__path__</span><span class="pi">:</span> <span class="s">/var/log/opnsense/*.log</span>
</pre></td></tr></tbody></table></code></pre></div></div>

<p>syslog-ng writes, Promtail reads. If you also had a Traefik <code class="language-plaintext highlighter-rouge">IngressRouteUDP</code> pointing at Promtail port 514, remove that too. Same problem.</p>

<h2 id="gotcha-3-opnsense-logs-are-csv-and-grafana-cannot-read-them-without-help">Gotcha 3: OPNsense Logs Are CSV and Grafana Cannot Read Them Without Help</h2>

<p>After fixing the first two, logs started arriving in Loki. Progress. But when I tried to build a dashboard, I hit a wall.</p>

<p>Every OPNsense firewall log line uses a format called filterlog. Each connection gets logged as a CSV string:</p>

<div class="language-plaintext highlighter-rouge"><div class="highlight"><pre class="highlight"><code><table class="rouge-table"><tbody><tr><td class="rouge-gutter gl"><pre class="lineno">1
</pre></td><td class="rouge-code"><pre>5,,,1000000103,em0.10,match,block,in,4,0x0,,64,0,0,none,6,tcp,...
</pre></td></tr></tbody></table></code></pre></div></div>

<p>Those fields contain everything you care about: which interface, whether the connection was blocked or passed, direction, protocol. But if you do not tell Promtail to parse them, Loki stores the whole thing as a blob of text. You cannot filter by protocol. You cannot ask for blocked inbound traffic only. You just get walls of unreadable CSV in your log panels.</p>

<p>Field positions (0-indexed): 4 = interface, 6 = action, 7 = direction, 8 = IP version, 16 = protocol.</p>

<p>Add a <code class="language-plaintext highlighter-rouge">pipeline_stages</code> block to your Promtail config to pull the useful bits out:</p>

<div class="language-yaml highlighter-rouge"><div class="highlight"><pre class="highlight"><code><table class="rouge-table"><tbody><tr><td class="rouge-gutter gl"><pre class="lineno">1
2
3
4
5
6
7
8
</pre></td><td class="rouge-code"><pre><span class="na">pipeline_stages</span><span class="pi">:</span>
  <span class="pi">-</span> <span class="na">regex</span><span class="pi">:</span>
      <span class="na">expression</span><span class="pi">:</span> <span class="s1">'</span><span class="s">filterlog\[\d+\]:</span><span class="nv"> </span><span class="s">(?:[^,]*,){4}(?P&lt;iface&gt;[^,]+),(?:[^,]+),(?P&lt;action&gt;block|pass|reject),(?P&lt;dir&gt;in|out),(?P&lt;ipver&gt;4|6)(?:(?:,[^,]*){7},(?P&lt;proto&gt;[^,]+))?'</span>
  <span class="pi">-</span> <span class="na">labels</span><span class="pi">:</span>
      <span class="na">action</span><span class="pi">:</span>
      <span class="na">dir</span><span class="pi">:</span>
      <span class="na">iface</span><span class="pi">:</span>
      <span class="na">proto</span><span class="pi">:</span>
</pre></td></tr></tbody></table></code></pre></div></div>

<p>You get <code class="language-plaintext highlighter-rouge">action</code>, <code class="language-plaintext highlighter-rouge">dir</code>, <code class="language-plaintext highlighter-rouge">iface</code>, and <code class="language-plaintext highlighter-rouge">proto</code> as proper Loki labels. Lines that are not filterlog (system events, DHCP, config changes) just pass through as-is.</p>

<blockquote class="prompt-tip">
  <p><strong>Why not pull out source and destination IPs too?</strong> Every unique IP creates its own Loki stream. Your firewall sees thousands of unique IPs. Label them and your query performance tanks. Leave IPs in the raw log line and pull them out with LogQL when you actually need them.</p>
</blockquote>

<h2 id="building-the-dashboard">
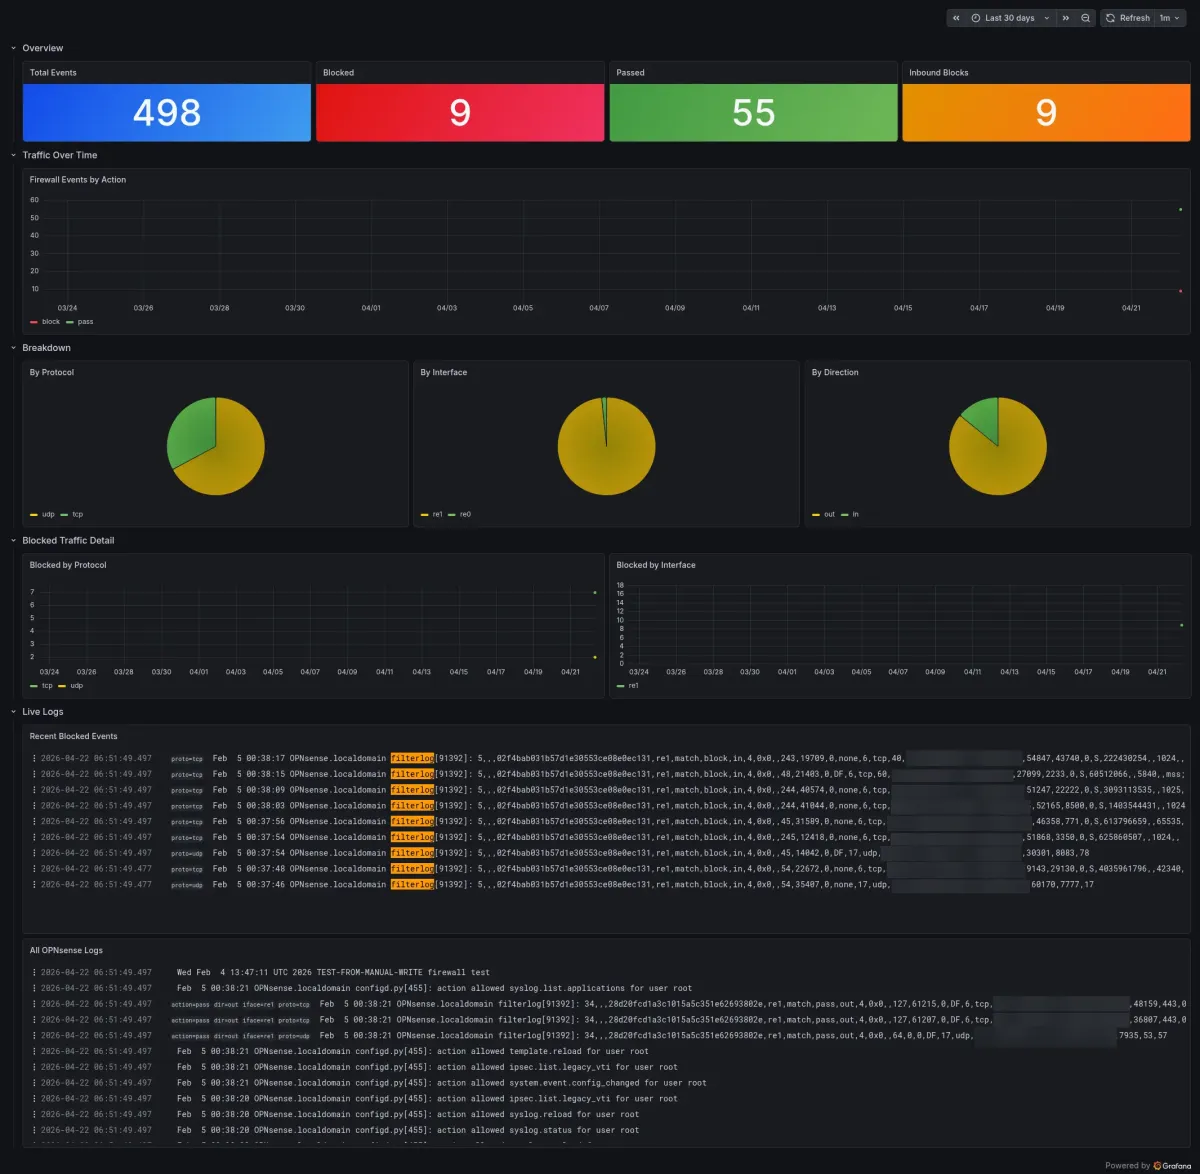
Building the Dashboard</h2>

<p>Once you have real labels, Grafana queries are straightforward.</p>

<p>Blocked vs passed over time: <code class="language-plaintext highlighter-rouge">sum by (action) (count_over_time({job="opnsense"}[$__interval]))</code>. Protocol split: <code class="language-plaintext highlighter-rouge">sum by (proto) (count_over_time({job="opnsense"}[$__range]))</code>. Same pattern with <code class="language-plaintext highlighter-rouge">iface</code> if you want to see which VLAN or interface the traffic is coming through.</p>

<p>For a live feed of blocked connections only: <code class="language-plaintext highlighter-rouge">{job="opnsense", action="block"} |= "filterlog"</code>.</p>

<p><img src="assets/img/posts/opnsenseDashboard.webp" alt="" /></p>

<p>Chuck the dashboard in a ConfigMap and it loads automatically every time Grafana starts. Lives in git with the rest of your infrastructure. No importing JSON through the UI every time you redeploy.</p>

<h2 id="the-short-version">The Short Version</h2>

<ul>
  <li><code class="language-plaintext highlighter-rouge">ClusterIP</code> is not reachable from outside Kubernetes. OPNsense is on your LAN. syslog-ng needs <code class="language-plaintext highlighter-rouge">LoadBalancer</code>.</li>
  <li>Promtail tails files. It does not receive syslog over UDP. Do not forward syslog to it from syslog-ng.</li>
  <li>OPNsense filterlog is CSV. Without a Promtail pipeline stage, everything in Loki is unreadable text you cannot filter.</li>
  <li>Label action, direction, interface, protocol. Keep source and destination IPs out of labels or query performance suffers.</li>
</ul>]]></content><author><name></name></author><category term="Homelab" /><category term="opnsense" /><category term="grafana" /><category term="loki" /><category term="promtail" /><category term="syslog-ng" /><category term="kubernetes" /><category term="selfhosted" /><category term="observability" /><category term="filterlog" /><summary type="html"><![CDATA[Getting OPNsense firewall logs into Grafana via syslog-ng, Promtail, and Loki sounds straightforward. Three silent failure points will stop it from working and give you no error to debug.]]></summary><media:thumbnail xmlns:media="http://search.yahoo.com/mrss/" url="https://ashishghimire.com/assets/img/headers/opnsenseLogging.webp" /><media:content medium="image" url="https://ashishghimire.com/assets/img/headers/opnsenseLogging.webp" xmlns:media="http://search.yahoo.com/mrss/" /></entry><entry><title type="html">My Electricity Bill Jumped From $300 to $800 in One Quarter. My Homelab Did It.</title><link href="https://ashishghimire.com/posts/homelab-electricity-bill-ram-fix/" rel="alternate" type="text/html" title="My Electricity Bill Jumped From $300 to $800 in One Quarter. My Homelab Did It." /><published>2026-04-11T23:00:00+10:00</published><updated>2026-04-11T23:00:00+10:00</updated><id>https://ashishghimire.com/posts/homelab-electricity-bill-ram-fix</id><content type="html" xml:base="https://ashishghimire.com/posts/homelab-electricity-bill-ram-fix/"><![CDATA[<p>My last electricity bill was $800 AUD for the quarter. Before the homelab got serious it was around $300. That is a $500 jump in three months and honestly, i did not see it coming.</p>

<p>I knew running servers 24/7 costs something. What i did not realise was how much of that $500 was pure waste. Not useful waste. Just forgotten stuff sitting there drawing power.</p>

<h2 id="what-changed-in-those-three-months">What Changed in Those Three Months</h2>

<p>Let’s be honest about what i added.</p>

<p>The biggest thing was the k3s cluster. I already had a GPU passthrough VM called ghostgpu running Ollama on a GTX 1660 Super for local AI. When i built out Kubernetes and started routing workloads through it, ghostgpu’s behaviour changed. Services like Immich ML for photo recognition, Paperless AI for document classification, karakeep’s AI bookmark categorisation, all of them started touching that GPU VM in ways they were not before. The GPU went from occasional inference to consistent workload. A GTX 1660 Super under load is not light on power.</p>

<p>On top of that i added a second 8TB drive to TrueNAS to set up a mirror. Two spinning hard drives 24/7 instead of one. Seagate Exos drives are not heavy power consumers but they are not free either, especially during scrubs.</p>

<p>Then there was everything i deployed on the cluster. I went a bit overboard. Sonarr, Radarr, Prowlarr, Readarr, Audiobookshelf, Kavita, the whole arr media stack. Authentik for SSO. Prometheus and Grafana for monitoring. Paperless for documents. karakeep for bookmarks. Most of it was genuinely useful at the time.</p>

<p>Then life got busy. Got a Netflix subscription. Amazon Prime covers the rest. I stopped using the media stack. But i never stopped running it. All those pods sitting there in memory, nodes drawing power, doing nothing for me.</p>

<p>That is the part that stings.</p>

<h2 id="finding-the-waste-the-vms-first">Finding the Waste: The VMs First</h2>

<p>First place i looked was Proxmox. I wanted to see what was actually running.</p>

<p>Two VMs stood out immediately.</p>

<p><code class="language-plaintext highlighter-rouge">security</code> was a VM i provisioned months ago to set up some security tools. Never got around to deploying anything. It was just on. 8 GB of RAM, CPU cores assigned, running nothing.</p>

<p><code class="language-plaintext highlighter-rouge">ghostmedia</code> was my old media server VM from before the Kubernetes migration. I had moved everything to the cluster but never deleted this VM. Still running Docker containers, some of them duplicating what was already on the cluster. Also 8 GB of RAM.</p>

<p>That is 16 GB sitting on two VMs doing nothing.</p>

<p>Here is the thing about Proxmox memory ballooning most people miss. Ballooning lets the hypervisor reclaim RAM from a VM down to a minimum floor you set. If that floor is too high, the balloon cannot deflate. Those VMs had their minimum at 8 GB. The host could not take a single byte back.</p>

<p>And idle VMs are worse than you think for CPU too. A powered-on VM needs housekeeping. The hypervisor schedules it. Those cores cannot reach deep sleep states. C-states are how a Ryzen drops power at idle. The 3600X can drop significantly when cores hit C6. Block that and the CPU sits at higher wattage around the clock, permanently.</p>

<p>I deleted both VMs. Biggest single win.</p>

<h2 id="finding-the-waste-the-kubernetes-cluster">Finding the Waste: The Kubernetes Cluster</h2>

<p>With the VMs sorted i looked at the cluster. Ran <code class="language-plaintext highlighter-rouge">kubectl top pods -A --sort-by=memory</code> and sorted by memory usage.</p>

<p><img src="assets/img/posts/kubectl-top-pods-before.webp" alt="kubectl top pods output sorted by memory showing paperless at 587MB, authentik server 515MB, authentik worker 404MB, prometheus 438MB, grafana 320MB and media stack pods all running before cleanup" /></p>

<p>Some numbers i expected. Paperless at 587 MB, karakeep at 328 MB with its AI features, authentik nearly a gigabyte between two pods. Those made sense.</p>

<p>What i did not expect: Grafana at 320 MB and Prometheus at 438 MB scraping ten machines every 15 seconds. Chrome, the headless browser karakeep uses for screenshots, sitting at 188 MB with zero limits set.</p>

<p>And the media stack. 937 MB combined across Sonarr, Radarr, Prowlarr, Readarr, Audiobookshelf, Kavita and the rest. Full replicas. For services i had not meaningfully touched since life got busy.</p>

<blockquote class="prompt-warning">
  <p><strong>Warning:</strong> RAM allocated in Kubernetes is not free. It keeps the node’s memory bus active and keeps the CPU managing page tables and caches. Not the same as an idle process doing nothing.</p>
</blockquote>

<h2 id="fixing-it">Fixing It</h2>

<p><strong>Media stack first.</strong> Scaled everything i was not using to zero:</p>

<div class="language-bash highlighter-rouge"><div class="highlight"><pre class="highlight"><code><table class="rouge-table"><tbody><tr><td class="rouge-gutter gl"><pre class="lineno">1
</pre></td><td class="rouge-code"><pre>kubectl scale deployment sonarr radarr prowlarr readarr audiobookshelf kavita lazylibrarian <span class="nt">-n</span> media <span class="nt">--replicas</span><span class="o">=</span>0
</pre></td></tr></tbody></table></code></pre></div></div>

<p>937 MB gone immediately. Can spin back up when i actually need them.</p>

<p><strong>Prometheus.</strong> Scraping ten hosts every 15 seconds is overkill for a homelab. Changed scrape interval to 60 seconds, added a storage retention size cap. Dropped from 438 MB to 242 MB.</p>

<p><strong>Chrome.</strong> No limits, no flags, just running wide open. Added flags to cap the V8 JavaScript heap and cut everything unnecessary:</p>

<div class="language-yaml highlighter-rouge"><div class="highlight"><pre class="highlight"><code><table class="rouge-table"><tbody><tr><td class="rouge-gutter gl"><pre class="lineno">1
2
3
4
5
6
</pre></td><td class="rouge-code"><pre><span class="na">args</span><span class="pi">:</span>
  <span class="pi">-</span> <span class="s">--js-flags=--max-old-space-size=128</span>
  <span class="pi">-</span> <span class="s">--disable-extensions</span>
  <span class="pi">-</span> <span class="s">--disable-background-networking</span>
  <span class="pi">-</span> <span class="s">--disable-sync</span>
  <span class="pi">-</span> <span class="s">--disable-translate</span>
</pre></td></tr></tbody></table></code></pre></div></div>

<p>188 MB down to 66 MB.</p>

<p><strong>Authentik.</strong> Default worker and thread counts designed for production. Set <code class="language-plaintext highlighter-rouge">AUTHENTIK_WEB__WORKERS=1</code> and <code class="language-plaintext highlighter-rouge">AUTHENTIK_WORKER__THREADS=1</code> in the Helm values file. Server came down from 515 MB to 377 MB.</p>

<p><strong>Tika.</strong> Apache Tika is what Paperless uses to parse PDFs and Office files. Java application. Java will eat all the heap you give it. Added a JVM cap:</p>

<div class="language-yaml highlighter-rouge"><div class="highlight"><pre class="highlight"><code><table class="rouge-table"><tbody><tr><td class="rouge-gutter gl"><pre class="lineno">1
2
3
</pre></td><td class="rouge-code"><pre><span class="na">env</span><span class="pi">:</span>
  <span class="pi">-</span> <span class="na">name</span><span class="pi">:</span> <span class="s">JAVA_TOOL_OPTIONS</span>
    <span class="na">value</span><span class="pi">:</span> <span class="s2">"</span><span class="s">-Xmx128m</span><span class="nv"> </span><span class="s">-Xms64m"</span>
</pre></td></tr></tbody></table></code></pre></div></div>

<p>Also found a YAML bug sitting quietly in the Paperless deployment. The <code class="language-plaintext highlighter-rouge">replicas</code>, <code class="language-plaintext highlighter-rouge">selector</code>, and <code class="language-plaintext highlighter-rouge">template</code> fields were under <code class="language-plaintext highlighter-rouge">metadata</code> instead of <code class="language-plaintext highlighter-rouge">spec</code>. Kubernetes was ignoring all three. Deployment was running on whatever defaults it fell back to. Hard to catch just by reading a long YAML file.</p>

<h2 id="the-results">The Results</h2>

<table>
  <thead>
    <tr>
      <th>Pod</th>
      <th>Before</th>
      <th>After</th>
      <th>Saved</th>
    </tr>
  </thead>
  <tbody>
    <tr>
      <td>Grafana</td>
      <td>320 MB</td>
      <td>100 MB</td>
      <td>220 MB</td>
    </tr>
    <tr>
      <td>Prometheus</td>
      <td>438 MB</td>
      <td>242 MB</td>
      <td>196 MB</td>
    </tr>
    <tr>
      <td>Authentik server</td>
      <td>515 MB</td>
      <td>377 MB</td>
      <td>138 MB</td>
    </tr>
    <tr>
      <td>Chrome</td>
      <td>188 MB</td>
      <td>66 MB</td>
      <td>122 MB</td>
    </tr>
    <tr>
      <td>Paperless</td>
      <td>587 MB</td>
      <td>525 MB</td>
      <td>62 MB</td>
    </tr>
    <tr>
      <td>Media stack</td>
      <td>~937 MB</td>
      <td>0 MB</td>
      <td>937 MB</td>
    </tr>
  </tbody>
</table>

<p>About 1.7 GB freed on the cluster, plus two Proxmox VMs and 16 GB of allocated RAM gone entirely.</p>

<p>Homeserver CPU temps dropped noticeably too. It was hitting 94 degrees Celsius during what should have been normal operation. Not dangerous for a 3600X but absolutely not idle behaviour. After the cleanup it settled back down.</p>

<p><img src="assets/img/posts/kubectl-top-pods-after.webp" alt="kubectl top pods output after cleanup showing paperless at 525MB, authentik server 377MB, prometheus 242MB, grafana 100MB and media stack scaled to zero" /></p>

<p>Grafana made the impact very visible. This is CPU usage across all hosts over the cleanup session.</p>

<p><img src="assets/img/posts/kubetwo-cpu-cleanup.webp" alt="Grafana CPU usage graph showing kubetwo dropping from 35 percent CPU to near zero after scaling down media stack and tuning Kubernetes pods, with a brief spike during authentik Helm upgrade" /></p>

<p>That cyan line is kubetwo. Started the session at around 35% CPU just from the bloated pods and media stack. Drops sharply after the scale-down and tuning. Spike in the middle is authentik restarting during the Helm upgrade. Then nearly nothing. The other hosts, nextcloud, utility, kubeone, flatlined the whole time. kubetwo was carrying almost all of the unnecessary load.</p>

<h2 id="about-the-local-ai-services">About the Local AI Services</h2>

<p>I want to be honest about the AI stuff because it is a real part of the power draw and it is not going away.</p>

<p>I run Ollama on the GPU VM for local language models. Immich uses ML for photo face recognition and smart search. Paperless AI classifies and tags documents. karakeep uses AI for bookmarks. All on my own hardware, on purpose.</p>

<p>The GTX 1660 Super draws power whether it is inferring or not. When Ollama is running a model it spikes well past 100 watts. That is expected and fine.</p>

<p>What i did not account for was Immich. My wife and i both moved off Apple Photos and Google Photos to self-host our entire library. Combined that is around 30,000 photos going back 15 years or more. When Immich ML runs its initial scan on a library that size, face recognition, object detection, smart search indexing across every single image, it does not finish in an afternoon. It runs for days. On the CPU. Constantly. That absolutely showed up in the power draw and i did not connect it to the bill until later.</p>

<p>It is also not done. The library keeps growing as we migrate more. And Paperless AI has barely been touched yet. I have not even started moving documents from Nextcloud into Paperless properly. When that happens and Paperless starts processing years of old scanned documents, there will be another burst of CPU-heavy work.</p>

<p>So there is a baseline cost and there are spikes. The Immich scan was a spike i did not plan for. More spikes are coming. That is fine, i would rather process everything locally than hand it to Google or Apple. But knowing when those spikes are coming is the difference between a surprise bill and a planned one.</p>

<p>The local AI services are deliberate. The forgotten arr pods were not. That distinction matters.</p>

<h2 id="this-is-not-just-a-homelab-problem">This Is Not Just a Homelab Problem</h2>

<p>This same pattern happens everywhere. VMs get provisioned for a project, nobody deletes them when it ends. Kubernetes clusters run at 15% utilisation because nobody set resource requests properly. Monitoring deployed with configs written for hundreds of machines running on eight.</p>

<p>Looking at actual consumption vs. what is allocated, finding what is running vs. what is actually being used, understanding which config options matter, that is real infrastructure work. The numbers are smaller here. The skill is the same.</p>

<p>Honestly, doing it at home on an electricity bill is better practice than doing it on a cloud bill. Every wrong call shows up in your wallet at the end of the quarter.</p>

<blockquote class="prompt-tip">
  <p><strong>Tip:</strong> In Proxmox, set the balloon minimum RAM close to what the VM needs at idle, not the max you want under load. A minimum set too high means the hypervisor can never reclaim that memory.</p>
</blockquote>

<h2 id="the-short-version">The Short Version</h2>

<ul>
  <li>Bill went from $300 to $800 AUD in one quarter. k3s expansion, new TrueNAS drive, GPU VM workload change, and a media stack i stopped using but never scaled down all contributed.</li>
  <li>Idle VMs in Proxmox keep CPU cores busy enough to block deep sleep states. Higher power floor around the clock.</li>
  <li><code class="language-plaintext highlighter-rouge">kubectl top pods -A --sort-by=memory</code> shows what is actually running. Defaults are almost never right for a homelab.</li>
  <li>Java applications eat heap. Cap them with <code class="language-plaintext highlighter-rouge">-Xmx</code> or they sit bloated forever.</li>
  <li>Local AI on a GPU costs real power and that is fine if you are using it. Paying for that and also running forgotten pods on top is the part to fix.</li>
</ul>

<p>The $500 is not fully reversed overnight. But i know exactly where it was coming from and how to keep it from growing back.</p>]]></content><author><name></name></author><category term="Homelab" /><category term="proxmox" /><category term="kubernetes" /><category term="homelab" /><category term="electricity" /><category term="ram" /><category term="cost" /><category term="selfhosted" /><category term="ollama" /><category term="ai" /><summary type="html"><![CDATA[Three months of homelab expansion, adding k3s, new storage, local AI, and forgetting to clean up what I was no longer using added $500 to my electricity bill. Here is how I found it and fixed it.]]></summary><media:thumbnail xmlns:media="http://search.yahoo.com/mrss/" url="https://ashishghimire.com/assets/img/headers/homelab-electricity-bill.webp" /><media:content medium="image" url="https://ashishghimire.com/assets/img/headers/homelab-electricity-bill.webp" xmlns:media="http://search.yahoo.com/mrss/" /></entry><entry><title type="html">I Finally Know If Anyone Reads This Blog</title><link href="https://ashishghimire.com/posts/blog-analytics-umami/" rel="alternate" type="text/html" title="I Finally Know If Anyone Reads This Blog" /><published>2026-03-21T00:00:00+11:00</published><updated>2026-03-21T00:00:00+11:00</updated><id>https://ashishghimire.com/posts/blog-analytics-umami</id><content type="html" xml:base="https://ashishghimire.com/posts/blog-analytics-umami/"><![CDATA[<p>For a while I had Google Analytics on this blog. The ID is still in my <code class="language-plaintext highlighter-rouge">_config.yml</code>. But here is the thing. I self-host almost everything. My photos, my notes, my automation, my media. And then I turn around and send every visitor’s data to Google so I can see a number go up. That felt wrong.</p>

<p>I also applied for Google Ads a few months back and got rejected. Not enough content yet. So I am building up posts and will try again later. But in the meantime I still want to know if people are actually reading, which posts get traffic, where they come from. Without handing that data to Google.</p>

<h2 id="why-umami">Why Umami</h2>

<p>Umami is self-hosted analytics. You run it yourself, data stays with you, no cookies, no GDPR banner needed. Lightweight script that loads fast. Dashboard shows you page views, visitors, referrers, countries, devices. Everything you actually care about.</p>

<p>The alternative I considered was Plausible. Same idea but paid unless you self-host it. Umami is free either way and the self-hosted version is the full thing, not a limited free tier.</p>

<h2 id="where-to-run-it">Where to Run It</h2>

<p>Here is the problem with running analytics on the homelab. The tracking script loads in your visitors’ browsers. When someone in Germany reads a post, their browser calls out to wherever you are hosting Umami to send the page view. If Umami is sitting on a VM under my desk, their browser cannot reach it.</p>

<p>I have a Cloudflare Tunnel running on the homelab which I use to expose n8n publicly for webhook reasons. I could have added Umami to that. But I already have an Oracle Cloud VM running WikiJS and Nginx Proxy Manager. It is already public, already has SSL sorted, already has NPM ready to proxy new services. Deploying Umami there was five minutes of work.</p>

<h2 id="the-ssl-problem">The SSL Problem</h2>

<p>I ran into one issue. My DNS records for <code class="language-plaintext highlighter-rouge">ashishghimire.com</code> are behind Cloudflare proxy. When NPM tries to get a Let’s Encrypt certificate it does the HTTP challenge. Cloudflare intercepts that and the request never reaches my Oracle VM. Certificate request fails.</p>

<p>The fix is a Cloudflare Origin Certificate. You generate it in the Cloudflare dashboard, it is valid for 15 years, covers all subdomains with a wildcard. Install it in NPM as a custom certificate, set Cloudflare SSL mode to Full (Strict), done. No more renewal headaches either.</p>

<p><img src="/assets/img/posts/umamiDashboard.webp" alt="Umami dashboard showing page views and visitor overview" /></p>

<h2 id="deploying-umami">Deploying Umami</h2>

<p>Separate compose file on the Oracle VM, Umami joins the existing <code class="language-plaintext highlighter-rouge">wiki-net</code> Docker network so NPM can reach it, its own Postgres on an internal network. Then add a proxy host in NPM pointing <code class="language-plaintext highlighter-rouge">umami.ashishghimire.com</code> to port 3000. Add the DNS record in Cloudflare.</p>

<p>First login is <code class="language-plaintext highlighter-rouge">admin</code> / <code class="language-plaintext highlighter-rouge">umami</code>. Change that immediately.</p>

<p>Add your site in Settings, copy the tracking script, and drop it into your Jekyll <code class="language-plaintext highlighter-rouge">_includes/head.html</code>. One file, one script tag. Chirpy picks it up and injects it into every page.</p>

<h2 id="what-i-can-see-now">What I Can See Now</h2>

<p>Real visitors, page by page. Which posts get traffic, which get nothing. Where people come from: direct, search, social. What country. Desktop or mobile.</p>

<p>Google Analytics was still running alongside this for a bit. After a week I am turning it off. I do not need two analytics systems and I definitely do not need the one that sends data to Google.</p>

<p>Give it a week and see what the numbers look like. If posts are getting read, great. If not, at least now I know for sure instead of guessing.</p>

<p><img src="/assets/img/posts/umamiStats.webp" alt="Umami page-level stats showing referrers, countries, and devices" /></p>

<h2 id="the-short-version">The Short Version</h2>

<ul>
  <li>Google Analytics collects your readers’ data and sends it to Google. Umami keeps it with you.</li>
  <li>If you self-host, Umami needs to be publicly reachable — either a cloud VM or a Cloudflare Tunnel.</li>
  <li>Cloudflare-proxied domains break Let’s Encrypt HTTP challenge. Use a Cloudflare Origin Certificate instead.</li>
  <li>Jekyll: one <code class="language-plaintext highlighter-rouge">_includes/head.html</code> file with the script tag is all you need.</li>
</ul>]]></content><author><name></name></author><category term="Homelab" /><category term="umami" /><category term="analytics" /><category term="selfhosted" /><category term="cloudflare" /><category term="jekyll" /><category term="oracle" /><summary type="html"><![CDATA[Google Analytics felt wrong. I self-host everything else so why am I sending my readers' data to Google? Here is how I set up Umami on my Oracle VM.]]></summary><media:thumbnail xmlns:media="http://search.yahoo.com/mrss/" url="https://ashishghimire.com/assets/img/headers/umamiAnalytics.webp" /><media:content medium="image" url="https://ashishghimire.com/assets/img/headers/umamiAnalytics.webp" xmlns:media="http://search.yahoo.com/mrss/" /></entry><entry><title type="html">Syncthing Three-Way Sync Across VLANs</title><link href="https://ashishghimire.com/posts/Syncthing-Three-Way-Sync-Across-VLANs/" rel="alternate" type="text/html" title="Syncthing Three-Way Sync Across VLANs" /><published>2026-03-20T00:00:00+11:00</published><updated>2026-04-11T17:39:25+10:00</updated><id>https://ashishghimire.com/posts/Syncthing-Three-Way-Sync-Across-VLANs</id><content type="html" xml:base="https://ashishghimire.com/posts/Syncthing-Three-Way-Sync-Across-VLANs/"><![CDATA[<p>I use Syncthing to sync my Obsidian vault. Server on the utility VM, Windows PC, and my Pixel. The server acts as the middle point so my phone and PC do not need to be online at the same time to stay in sync. It has worked great. A minute or two for changes to sync across, which is totally fine for notes.</p>

<p>Then I upgraded my network and introduced VLANs. That broke everything.</p>

<h2 id="why-i-turned-off-global-discovery-and-relay">Why I Turned Off Global Discovery and Relay</h2>

<p>When you first set up Syncthing it uses global discovery and relay by default. Discovery lets devices find each other through Syncthing’s infrastructure. Relay is a fallback when direct connections fail, it routes your traffic through Syncthing’s relay servers.</p>

<p>Now I had two reasons to turn both off.</p>

<p>First, I started monitoring my DNS traffic and noticed how noisy Syncthing was. Constant calls out to discovery servers, relay servers, checking in. Since I host everything locally and I have Twingate installed for remote access, there was no reason for any of that. I want sync traffic to stay on my LAN, not bounce through someone else’s infrastructure.</p>

<p>Second, I had just set up VLANs so I already knew my network was about to get more restrictive. Better to get off the global infrastructure now and do it properly.</p>

<p>So I turned off global discovery and relay. Clean, local, exactly how I wanted it.</p>

<p>That is when things broke.</p>

<h2 id="what-vlans-actually-did">What VLANs Actually Did</h2>

<p>Servers sit on VLAN 10. PC on VLAN 50. Phone on VLAN 20. Three different network segments with firewall rules controlling what can talk to what.</p>

<p>Without global discovery, Syncthing needs to know exactly where to find each device. It used to use UDP multicast on port 21027 for local discovery. Multicast does not cross VLAN boundaries. So with global discovery off and local discovery also useless across VLANs, every device just sat there. Last seen: never.</p>

<p>There is also mDNS involved in local discovery. mDNS is link-local only, it does not cross VLANs on its own. To make it work across segments you need a multicast proxy bridging the VLANs, and I did not want to set that up without fully understanding what it would expose. A proxy like that could let devices on one VLAN discover services on another, which might be more visibility than I want between segments. Pinning addresses manually is simpler and I know exactly what it does.</p>

<p>The already running service that had been working for months was now completely broken.</p>

<p><img src="assets/img/posts/syncthingTwoDevices.webp" alt="Syncthing showing two devices with last seen: never after VLAN split" /></p>

<h2 id="fix-1-pin-addresses-manually">Fix 1: Pin Addresses Manually</h2>

<p>If Syncthing cannot discover devices on its own, you tell it where they are. Simple rule: stationary hosts get a pinned address, mobile devices get <code class="language-plaintext highlighter-rouge">dynamic</code> because their IP changes.</p>

<table>
  <thead>
    <tr>
      <th>Device entry</th>
      <th>Address</th>
    </tr>
  </thead>
  <tbody>
    <tr>
      <td>Server (from any client)</td>
      <td><code class="language-plaintext highlighter-rouge">tcp://10.10.10.114:22000</code></td>
    </tr>
    <tr>
      <td>Windows PC (from Pixel)</td>
      <td><code class="language-plaintext highlighter-rouge">tcp://10.10.50.100:22000</code></td>
    </tr>
    <tr>
      <td>Phone (from anyone)</td>
      <td><code class="language-plaintext highlighter-rouge">dynamic</code></td>
    </tr>
  </tbody>
</table>

<p>The phone’s IP changes across different networks so you cannot pin it. Let the phone always dial out and the other devices will accept the connection.</p>

<p>One thing that tripped me up here. Syncthing has a “device defaults” setting under Actions then Settings. I changed the address there assuming it would update existing devices. It does not. It only applies to new devices added after you change it. Had to go into each existing device individually and update the address.</p>

<p><img src="assets/img/posts/pixelSyncthing.webp" alt="Syncthing device settings on Pixel showing manually pinned address" /></p>

<h2 id="fix-2-firewall-rules-in-opnsense">Fix 2: Firewall Rules in OPNsense</h2>

<p>Even after pinning addresses, the phone and PC would not connect directly to each other. VLAN 20 where the phone lives had no rule allowing it to reach VLAN 50 where the PC is. Needed to add one.</p>

<p>Adding the rule was easy. The order was what got me. OPNsense processes rules top to bottom and stops at the first match. I added the Syncthing pass rule but it ended up below an existing block rule for that VLAN pair. The pass rule was never being evaluated.</p>

<p>Correct order on the PERSONAL interface:</p>

<div class="language-plaintext highlighter-rouge"><div class="highlight"><pre class="highlight"><code><table class="rouge-table"><tbody><tr><td class="rouge-gutter gl"><pre class="lineno">1
2
3
4
5
6
</pre></td><td class="rouge-code"><pre>Pass   PERSONAL net   SERVERS net     any
Pass   PERSONAL net   TENANTS net     any
Pass   PERSONAL net   IOT net         any
Pass   PERSONAL net   PC net          TCP/UDP  22000   &lt;- Syncthing exception
Block  PERSONAL net   PC net          any              &lt;- everything else blocked
Pass   PERSONAL net   *               any              &lt;- internet
</pre></td></tr></tbody></table></code></pre></div></div>

<p>Pass rule for Syncthing port above the catch-all block. Move it up, direct connections started working.</p>

<p><img src="assets/img/posts/firewallRule.webp" alt="OPNsense firewall rules showing Syncthing pass rule above the block rule" /></p>

<h2 id="pairing-devices">Pairing Devices</h2>

<p>Do not type device IDs manually. When an unknown device tries to connect Syncthing shows a banner asking if you want to add it. Click that, approve on both sides and done. Typing those long IDs is slow and error prone.</p>

<h2 id="how-it-looks-now">How It Looks Now</h2>

<p>Three-way sync working again. Server and PC, server and phone as the main sync paths. Phone and PC also connect directly when both are on the LAN. All connections show direct LAN IPs, no relay, no DNS noise.</p>

<p>Obsidian vault syncing as it should be, now fully local.</p>

<p><img src="assets/img/posts/diagramSyncthing.webp" alt="Diagram of three-way Syncthing sync across VLANs 10, 20, and 50" /></p>

<p><img src="assets/img/posts/syncthingDevices.webp" alt="Syncthing device list showing all connections as direct LAN with no relay" /></p>

<h2 id="the-short-version">The Short Version</h2>

<ul>
  <li>Turning off global discovery means Syncthing cannot find devices on its own. Pin addresses for stationary hosts, use <code class="language-plaintext highlighter-rouge">dynamic</code> for mobile.</li>
  <li>“Device defaults” does not update existing devices. Change each one manually.</li>
  <li>mDNS is link-local only and does not cross VLANs without a multicast proxy. A proxy bridges discovery across segments which may expose more than you want. Pinning addresses manually is simpler and more predictable.</li>
  <li>OPNsense rule order matters. Pass rule must sit above any block rule for the same destination.</li>
</ul>]]></content><author><name></name></author><category term="Homelab" /><category term="syncthing" /><category term="vlan" /><category term="networking" /><category term="opnsense" /><category term="docker" /><category term="selfhosted" /><summary type="html"><![CDATA[VLANs broke my Syncthing setup. Global discovery off, relay off, and Syncthing had no idea where my devices were. Here is how I fixed it.]]></summary><media:thumbnail xmlns:media="http://search.yahoo.com/mrss/" url="https://ashishghimire.com/assets/img/headers/syncthingVlan.webp" /><media:content medium="image" url="https://ashishghimire.com/assets/img/headers/syncthingVlan.webp" xmlns:media="http://search.yahoo.com/mrss/" /></entry><entry><title type="html">Broken Docker DNS Due to Pi-hole</title><link href="https://ashishghimire.com/posts/Broken-Docker-DNS-Due-to-PiHole/" rel="alternate" type="text/html" title="Broken Docker DNS Due to Pi-hole" /><published>2026-03-11T00:00:00+11:00</published><updated>2026-03-11T00:00:00+11:00</updated><id>https://ashishghimire.com/posts/Broken-Docker-DNS-Due-to-PiHole</id><content type="html" xml:base="https://ashishghimire.com/posts/Broken-Docker-DNS-Due-to-PiHole/"><![CDATA[<p>New container, can’t resolve DNS. Classic. Except this time I’d already set the DNS in <code class="language-plaintext highlighter-rouge">daemon.json</code>, restarted Docker, checked iptables — everything looked right. Ping worked. DNS didn’t. Spent way too long on this one.</p>

<p>Here’s what actually happened.</p>

<h2 id="symptoms">Symptoms</h2>

<ul>
  <li>New Docker containers can’t resolve DNS</li>
  <li><code class="language-plaintext highlighter-rouge">nslookup google.com</code> inside container returns <code class="language-plaintext highlighter-rouge">connection refused</code> or <code class="language-plaintext highlighter-rouge">no servers could be reached</code></li>
  <li><code class="language-plaintext highlighter-rouge">ping 1.1.1.1</code> from inside the same container works fine</li>
  <li>Existing containers on manually created networks work</li>
  <li><code class="language-plaintext highlighter-rouge">docker run --rm --network host busybox nslookup google.com</code> resolves fine</li>
</ul>

<h2 id="everything-i-checked-that-wasnt-the-problem">Everything I Checked That Wasn’t The Problem</h2>

<ul>
  <li><code class="language-plaintext highlighter-rouge">daemon.json</code> — DNS correctly set, config validated with <code class="language-plaintext highlighter-rouge">dockerd --validate</code></li>
  <li>systemd override — bare <code class="language-plaintext highlighter-rouge">dockerd</code> was running and reading <code class="language-plaintext highlighter-rouge">daemon.json</code> correctly</li>
  <li>iptables FORWARD chain — DOCKER-FORWARD had all the right ACCEPT rules</li>
  <li>MASQUERADE rules — all bridge subnets were covered in POSTROUTING</li>
  <li>Bogon blocking on OPNsense — not enabled</li>
  <li>Removed TCP port 2375 exposure — good cleanup but didn’t fix DNS</li>
  <li><code class="language-plaintext highlighter-rouge">/run/docker.sock</code> was a <strong>directory</strong> instead of a socket file — fixed it, DNS still broken</li>
</ul>

<h2 id="the-actual-root-cause">The Actual Root Cause</h2>

<p>Pi-hole’s nftables rules were redirecting all DNS traffic to port 55, even though Pi-hole hadn’t been running for a while.</p>

<p>When Pi-hole runs as a Docker container it injects rules into the nftables <code class="language-plaintext highlighter-rouge">ip nat PREROUTING</code> chain to intercept DNS:</p>

<div class="language-plaintext highlighter-rouge"><div class="highlight"><pre class="highlight"><code><table class="rouge-table"><tbody><tr><td class="rouge-gutter gl"><pre class="lineno">1
2
</pre></td><td class="rouge-code"><pre>udp dport 53 redirect to :55
tcp dport 53 redirect to :55
</pre></td></tr></tbody></table></code></pre></div></div>

<p>These rules <strong>do not get cleaned up</strong> when you stop or remove the container. So with nothing listening on port 55 anymore, every DNS query from every container was getting an ICMP port unreachable back — which shows up as “connection refused” in nslookup.</p>

<p>The reason ping worked but DNS didn’t is straightforward: ICMP doesn’t touch port 53, so MASQUERADE and routing worked fine. DNS specifically hits the redirect rule and dies there.</p>

<p>You can spot it instantly:</p>

<div class="language-bash highlighter-rouge"><div class="highlight"><pre class="highlight"><code><table class="rouge-table"><tbody><tr><td class="rouge-gutter gl"><pre class="lineno">1
</pre></td><td class="rouge-code"><pre><span class="nb">sudo </span>nft list ruleset | <span class="nb">grep</span> <span class="nt">-E</span> <span class="s2">"53|redirect"</span>
</pre></td></tr></tbody></table></code></pre></div></div>

<h2 id="fix">Fix</h2>

<p>Find the rule handles and delete them:</p>

<div class="language-bash highlighter-rouge"><div class="highlight"><pre class="highlight"><code><table class="rouge-table"><tbody><tr><td class="rouge-gutter gl"><pre class="lineno">1
2
3
4
5
</pre></td><td class="rouge-code"><pre><span class="c"># See the handles</span>
<span class="nb">sudo </span>nft <span class="nt">-a</span> list chain ip nat PREROUTING | <span class="nb">grep</span> <span class="s2">"redirect to"</span>

<span class="c"># Delete by handle number</span>
<span class="nb">sudo </span>nft delete rule ip nat PREROUTING handle &lt;handle_number&gt;
</pre></td></tr></tbody></table></code></pre></div></div>

<p>Or do it in one shot:</p>

<div class="language-bash highlighter-rouge"><div class="highlight"><pre class="highlight"><code><table class="rouge-table"><tbody><tr><td class="rouge-gutter gl"><pre class="lineno">1
2
</pre></td><td class="rouge-code"><pre><span class="nb">sudo </span>nft delete rule ip nat PREROUTING handle <span class="si">$(</span><span class="nb">sudo </span>nft <span class="nt">-a</span> list chain ip nat PREROUTING | <span class="nb">grep</span> <span class="s2">"redirect to :55"</span> | <span class="nb">grep </span>udp | <span class="nb">awk</span> <span class="s1">'{print $NF}'</span><span class="si">)</span>
<span class="nb">sudo </span>nft delete rule ip nat PREROUTING handle <span class="si">$(</span><span class="nb">sudo </span>nft <span class="nt">-a</span> list chain ip nat PREROUTING | <span class="nb">grep</span> <span class="s2">"redirect to :55"</span> | <span class="nb">grep </span>tcp | <span class="nb">awk</span> <span class="s1">'{print $NF}'</span><span class="si">)</span>
</pre></td></tr></tbody></table></code></pre></div></div>

<p>Verify:</p>

<div class="language-bash highlighter-rouge"><div class="highlight"><pre class="highlight"><code><table class="rouge-table"><tbody><tr><td class="rouge-gutter gl"><pre class="lineno">1
</pre></td><td class="rouge-code"><pre>docker run <span class="nt">--rm</span> busybox nslookup google.com
</pre></td></tr></tbody></table></code></pre></div></div>

<h2 id="bonus-the-docker-socket-was-a-directory">Bonus: The Docker Socket Was a Directory</h2>

<p>While debugging I also found <code class="language-plaintext highlighter-rouge">/run/docker.sock</code> was a directory instead of a socket file, which is why <code class="language-plaintext highlighter-rouge">docker</code> commands weren’t connecting. Likely caused by a failed Docker startup writing to the path before the socket was created.</p>

<div class="language-bash highlighter-rouge"><div class="highlight"><pre class="highlight"><code><table class="rouge-table"><tbody><tr><td class="rouge-gutter gl"><pre class="lineno">1
2
3
4
</pre></td><td class="rouge-code"><pre><span class="nb">sudo </span>systemctl stop docker docker.socket
<span class="nb">sudo rm</span> <span class="nt">-rf</span> /run/docker.sock
<span class="nb">sudo </span>systemctl start docker.socket
<span class="nb">sudo </span>systemctl start docker
</pre></td></tr></tbody></table></code></pre></div></div>

<h2 id="takeaways">Takeaways</h2>

<ul>
  <li>If Docker DNS fails but ping works, check nftables before anything else</li>
  <li>Pi-hole does not clean up its nftables rules on removal — you have to do it manually</li>
  <li><code class="language-plaintext highlighter-rouge">docker run --rm --network host busybox nslookup google.com</code> is a fast way to confirm whether the issue is bridge networking or something deeper</li>
</ul>]]></content><author><name></name></author><category term="Homelab" /><category term="docker" /><category term="dns" /><category term="pihole" /><category term="networking" /><category term="debugging" /><summary type="html"><![CDATA[Docker containers couldn't resolve DNS despite correct daemon.json config. The real culprit was Pi-hole's leftover nftables rules redirecting all DNS traffic to a closed port.]]></summary><media:thumbnail xmlns:media="http://search.yahoo.com/mrss/" url="https://ashishghimire.com/assets/img/headers/dockerBrokenDNS.webp" /><media:content medium="image" url="https://ashishghimire.com/assets/img/headers/dockerBrokenDNS.webp" xmlns:media="http://search.yahoo.com/mrss/" /></entry><entry><title type="html">SSH + Zsh Prompt Duplication, Broken Nano, and the One-Line Fix</title><link href="https://ashishghimire.com/posts/SSH-+-Zsh-Prompt-Duplication-Broken-Nano-and-the-One-Line-Fix/" rel="alternate" type="text/html" title="SSH + Zsh Prompt Duplication, Broken Nano, and the One-Line Fix" /><published>2026-01-07T09:02:00+11:00</published><updated>2026-01-07T09:02:00+11:00</updated><id>https://ashishghimire.com/posts/SSH-+-Zsh-Prompt-Duplication-Broken-Nano-and-the-One-Line-Fix</id><content type="html" xml:base="https://ashishghimire.com/posts/SSH-+-Zsh-Prompt-Duplication-Broken-Nano-and-the-One-Line-Fix/"><![CDATA[<h2 id="background">Background</h2>
<p>So with latest windows Updates its so hard to stay now, almost like they want you out. So i decided to use Linux as main gig again. Now i use Linux on my Laptops and Servers, it’s even as secondary boot in my main workstation. But i play invasive games like Valorant, FIFA and GTA Online (Now Borked in Linux) with my friends, i have to run Windows. 
Now this story will continue somewhere else.
So recently i have decided to build a real, usable, stable Linux system for my main workstation.</p>

<h2 id="configuration">Configuration</h2>

<p>Here is what i have decided to go with, for my system.</p>

<h3 id="main-rig">Main Rig</h3>

<table>
  <thead>
    <tr>
      <th>MAIN RIG</th>
      <th> </th>
    </tr>
  </thead>
  <tbody>
    <tr>
      <td>Distro</td>
      <td>Arch Linux</td>
    </tr>
    <tr>
      <td>Desktop Env.</td>
      <td>KDE Plasma</td>
    </tr>
    <tr>
      <td>Shell</td>
      <td>ZSH</td>
    </tr>
    <tr>
      <td>Terminal</td>
      <td>Ghostty</td>
    </tr>
  </tbody>
</table>

<p>Even though i have pretty beefy rig i wanted it to be less bloat, so i chose <code class="language-plaintext highlighter-rouge">ghostty</code> from get go and removed <code class="language-plaintext highlighter-rouge">konsole</code>. Also set one application per purpose. I mean i even cut down terminal, who could go cheaper than that? I also have a <code class="language-plaintext highlighter-rouge">bootstrapped</code> dotfiles, which was repurposed from Workstation to Server dotfiles at <code class="language-plaintext highlighter-rouge">https://github.com/ghimireaacs/serverdotfiles</code>. So all my servers are configured using this. Hence all of them have:</p>

<h3 id="servers">Servers</h3>

<table>
  <thead>
    <tr>
      <th>SERVERS</th>
      <th> </th>
    </tr>
  </thead>
  <tbody>
    <tr>
      <td>Distro</td>
      <td>Ubuntu</td>
    </tr>
    <tr>
      <td>Desktop Env.</td>
      <td>NONE</td>
    </tr>
    <tr>
      <td>Shell</td>
      <td>ZSH</td>
    </tr>
    <tr>
      <td>Terminal</td>
      <td>SSH client-owned</td>
    </tr>
  </tbody>
</table>

<h3 id="dotfiles">DOTFILES</h3>

<table>
  <thead>
    <tr>
      <th>DOTFILES Components</th>
      <th> </th>
    </tr>
  </thead>
  <tbody>
    <tr>
      <td>Oh My Zsh</td>
      <td> </td>
    </tr>
    <tr>
      <td>Powerelvel10k</td>
      <td> </td>
    </tr>
    <tr>
      <td>Custom Aliases</td>
      <td> </td>
    </tr>
    <tr>
      <td>Custom Exports</td>
      <td> </td>
    </tr>
    <tr>
      <td>Custom .zshrc</td>
      <td> </td>
    </tr>
  </tbody>
</table>

<hr />

<p>I also recently updated them so i could have same aliases and system running everywhere so its seamless, however i also wanted my servers and workstation to look and behave slightly different, because each have their own need. So i updated the files again, and bootstrapped with my workstation.
Now it does auto finds distro and installs needed packages accordingly, also has multiple identifiers for workstation and server so it behaves a certain way. I thought this will be the problem but they were fine.
I installed in my main rig, Voila, worked like a charm. I reconfigured this, adjusted with necessary changes, modified prompts and <code class="language-plaintext highlighter-rouge">git push</code>.</p>

<p><img src="assets/img/posts/20260107182116.webp" alt="Ghostty terminal with Zsh, Oh My Zsh and Powerlevel10k working on the main rig before the issue appeared" /></p>

<h2 id="problem">Problem</h2>

<blockquote class="prompt-tip">
  <p><strong>Question:</strong> So what broke?</p>
</blockquote>

<p>At first i got this multiple prompts which looked weird on its own, which i thought was a minor bug. Then i tried to clear screen with <code class="language-plaintext highlighter-rouge">ctrl + l</code> and it failed. Then i started to type something, well i got double of same things, and it was broken.</p>

<p><img src="assets/img/posts/20260107182648.webp" alt="Broken Zsh prompt showing duplicated lines and garbled output when SSH-ing from Ghostty" /></p>

<h3 id="troubleshooting">Troubleshooting</h3>

<p>Now after this i tried a bunch of different things i don’t remember in order but most obvious were:</p>

<ol>
  <li>Changing shell from <code class="language-plaintext highlighter-rouge">zsh</code> to <code class="language-plaintext highlighter-rouge">bash</code>
  So I was already on remote, i switched to bash, it fixed some problem like the prompts weren’t weird  anymore, however <code class="language-plaintext highlighter-rouge">ctrl + l</code> didn’t behave like it should. It did’t clear console but did got to new line, which turns out to be terminal capability issue. I did find a 🗝️ clue here, but i treated it as another sort of problem. I also tried changing local <code class="language-plaintext highlighter-rouge">zsh</code> to <code class="language-plaintext highlighter-rouge">bash</code>and then ssh to remote, problem persisted.</li>
  <li>Changing Terminal from <code class="language-plaintext highlighter-rouge">ghostty</code> to <code class="language-plaintext highlighter-rouge">kitty</code>
 Even after switching to a completely different terminal <code class="language-plaintext highlighter-rouge">kitty</code>, well you guessed it, same problem.</li>
  <li>Changing OS
 Now NO! I did not nuke my system again, i booted back to my Windows, ssh from there, guess what? No error! This made me sure there was something wrong with my <code class="language-plaintext highlighter-rouge">ZSH</code> or <code class="language-plaintext highlighter-rouge">ghostty</code> config or my Entire <code class="language-plaintext highlighter-rouge">dotfiles</code>, well mostly <code class="language-plaintext highlighter-rouge">.zshrc</code>.</li>
  <li>Cleared <code class="language-plaintext highlighter-rouge">ZSH CACHE</code> before launching ssh.</li>
  <li>Tried <code class="language-plaintext highlighter-rouge">zsh -f</code>, <code class="language-plaintext highlighter-rouge">zsh -T</code> none of them worked.</li>
  <li>Tried changing SERVER Config
 So remember when i said i got a clue? I tried <code class="language-plaintext highlighter-rouge">nano ~/.zshrc</code> to make changes on server side, there now i had that again.
 <code class="language-plaintext highlighter-rouge">Error opening terminal: xterm-ghostty.</code>
 There, there’s the solution.</li>
</ol>

<blockquote class="prompt-warning">
  <p><strong>BUG:</strong> Error opening terminal: xterm-ghostty.</p>
</blockquote>

<h2 id="root-cause">Root Cause</h2>

<p>Turns out when we SSH, the client exports the <code class="language-plaintext highlighter-rouge">TERM</code> environment variable to the server.
Since we have <code class="language-plaintext highlighter-rouge">TERM=xterm-ghostty</code> in our local machine, it sent exactly that. Now my server received this and used this, since the server did not have a matching <code class="language-plaintext highlighter-rouge">terminfo</code> entry for <code class="language-plaintext highlighter-rouge">xterm-ghostty</code>, this caused terminal capability misinterpretation.</p>

<h2 id="solution">Solution</h2>

<p>Now i use <code class="language-plaintext highlighter-rouge">config</code> file for my ssh, this helps me simplify my hostnames, have different private keys tied to different machines and its portable, so far. Until i needed to add this one more configuration:</p>

<div class="language-ssh highlighter-rouge"><div class="highlight"><pre class="highlight"><code><table class="rouge-table"><tbody><tr><td class="rouge-gutter gl"><pre class="lineno">1
2
3
4
</pre></td><td class="rouge-code"><pre>
<span class="k">Host</span> *
    <span class="k">SetEnv</span> TERM=xterm-256color

</pre></td></tr></tbody></table></code></pre></div></div>

<p>This configuration helps me have a consistent TERM across all my hosts.</p>

<hr />

<p>That’s the solution.</p>

<h2 id="tldr">TL;DR</h2>

<ul>
  <li>I wanted a pretty, functional prompt across my workspace and servers.</li>
  <li>I used ZSH, OMZ and  <code class="language-plaintext highlighter-rouge">ghostty</code> terminal to achieve this.</li>
  <li>This introduced a <code class="language-plaintext highlighter-rouge">TERM</code> mismatch across SSH sessions.</li>
  <li>Setting a consistent <code class="language-plaintext highlighter-rouge">TERM</code> in <code class="language-plaintext highlighter-rouge">config</code> file solved it.</li>
</ul>

<blockquote class="prompt-tip">
  <p><strong>Tip:</strong> Set <code class="language-plaintext highlighter-rouge">TERM</code> in your SSH config to avoid terminal capability issues.</p>
</blockquote>]]></content><author><name></name></author><category term="Linux" /><category term="ssh" /><category term="zsh" /><category term="linux" /><category term="ghostty" /><category term="powerlevel10k" /><category term="oh-my-zsh" /><category term="terminal" /><category term="homelab" /><summary type="html"><![CDATA[Zsh prompt duplicating and nano rendering broken when SSH-ing from Ghostty into a remote server. Root cause was a terminal type mismatch. Fixed with one environment variable.]]></summary><media:thumbnail xmlns:media="http://search.yahoo.com/mrss/" url="https://ashishghimire.com/assets/img/headers/p10kbug.webp" /><media:content medium="image" url="https://ashishghimire.com/assets/img/headers/p10kbug.webp" xmlns:media="http://search.yahoo.com/mrss/" /></entry><entry><title type="html">How I Utilize Github to Store and Download My Public SSH Keys</title><link href="https://ashishghimire.com/posts/How-I-Utilize-Github-For-SSH/" rel="alternate" type="text/html" title="How I Utilize Github to Store and Download My Public SSH Keys" /><published>2025-08-09T02:32:00+10:00</published><updated>2026-04-11T17:39:25+10:00</updated><id>https://ashishghimire.com/posts/How-I-Utilize-Github-For-SSH</id><content type="html" xml:base="https://ashishghimire.com/posts/How-I-Utilize-Github-For-SSH/"><![CDATA[<p>The first thing I do after I install a fresh new VM is SSH into that machine and use it locally. Now i will not rant about SSH and its uses and why you need it or why it’s better than web console. So, let’s get to the point.</p>

<h2 id="logging-in">Logging In</h2>

<p>There are two ways we can login to server:</p>

<ol>
  <li>Key Pair Method</li>
  <li>Username/Password</li>
</ol>

<p>Although SSH is very secure protocol in on itself, it is not totally immune to Bruteforce attack and other Human Errors that could lead to some error. By allowing users to login with <mark style="background: #FF5582A6;">Username and Password</mark>, we leave the machine vulnerable to such attacks. And that’s here <mark style="background: #BBFABBA6;">KeyPair Method</mark> comes.</p>

<p><mark style="background: #BBFABBA6;">KeyPair Method</mark>: In this method we will have a Public Key and Private Key. Each of the keys are a long random complex characters As their name suggest one can be Public and another should be kept very securely.</p>

<p>For our intense and purpose, Public Keys are stored in Remote Server and Private Keys are stored in Our Private Machine.</p>

<p><img src="assets/img/posts/8898976de2367d86c92f90b095b64c16.webp" alt="Diagram showing public key stored on remote server and private key on local machine" /></p>

<h2 id="generating-key-pair">Generating Key Pair</h2>

<p>Now before we move on to server setup, let’s create a key pair.</p>

<ol>
  <li>Open your CLI</li>
  <li><code class="language-plaintext highlighter-rouge">ssh-keygen -t ed25519 -C "username@email.com"</code>
<img src="assets/img/posts/0bbec1ea9a1d9bef9e78ecf8166e8980.webp" alt="Terminal showing ssh-keygen -t ed25519 command output" /></li>
  <li>Set a Passphrase. (This is not SSH password it’s extra layer of security to use you private key.)
<img src="assets/img/posts/5b5ef986d2597846f46e73e547763d8a.webp" alt="Terminal prompting to enter a passphrase for the SSH key" />
    <blockquote>
      <p>💡 I choose default name so i do not have to provide ‘-i keyfile’ during login. But if you have multiple private key for different purpose you can name them accordingly.</p>
    </blockquote>
  </li>
</ol>

<p>Now you will have 2 files. Private key: <code class="language-plaintext highlighter-rouge">id_ed25519</code> and Public key with <code class="language-plaintext highlighter-rouge">.pub</code> extension: <code class="language-plaintext highlighter-rouge">id_ed25519.pub</code>, in your ~/.ssh directory.</p>

<h3 id="permissions">Permissions</h3>

<p>Make sure you have correct permission set for your keys when you download or paste it in a file. You do not need to worry about permission on the files created by the command however if you choose to backup or copy it in another file you should set the following permission.</p>

<div class="language-bash highlighter-rouge"><div class="highlight"><pre class="highlight"><code><table class="rouge-table"><tbody><tr><td class="rouge-gutter gl"><pre class="lineno">1
2
3
</pre></td><td class="rouge-code"><pre><span class="nb">chmod </span>700 ~/.ssh
<span class="nb">chmod </span>600 ~/.ssh/id_25519
<span class="nb">chmod </span>644 ~/.ssh/id_25519.pub
</pre></td></tr></tbody></table></code></pre></div></div>

<h2 id="storing-the-keys">Storing The Keys</h2>

<h3 id="private-keys">Private Keys</h3>

<p>This should always be on your local machine and nowhere else but you can use a password manager like <a href="/posts/Bitwarden/">Bitwarden</a> for backup.</p>

<h3 id="public-keys">Public Keys</h3>

<p>Now this is the best part, you can store this anywhere but i would recommend it to store in Github or Launchpad. For me, I use Github a lot so i choose Github.</p>

<ol>
  <li>
    <p>Go to Github Settings</p>

    <p><img src="assets/img/posts/ebde93544f57e002c486e5b57e611c2c.webp" alt="GitHub profile settings navigation menu" /></p>
  </li>
  <li>
    <p>On Access Tab choose <code class="language-plaintext highlighter-rouge">SSH and GPG Keys</code></p>

    <p><img src="assets/img/posts/9c6fe9e312380988b65b7521a0a2aff3.webp" alt="GitHub Access settings showing SSH and GPG Keys section" /></p>
  </li>
  <li>
    <p>Click on New SSH Key</p>

    <p><img src="assets/img/posts/62e39e14921f61e435decc112e9c2a96.webp" alt="GitHub New SSH Key button highlighted" /></p>
  </li>
  <li>
    <p>Set a Title, Key Type: <code class="language-plaintext highlighter-rouge">Authentication Key</code></p>
  </li>
  <li>
    <p>Key: Now paste contents of <code class="language-plaintext highlighter-rouge">id_25519.pub</code> ‼️ Check its <code class="language-plaintext highlighter-rouge">.pub</code>.</p>
  </li>
  <li>
    <p>Add SSH Key</p>

    <p><img src="assets/img/posts/069032f2bce598e18d1e8885fd000002.webp" alt="GitHub Add SSH Key form with title and key fields filled in" /></p>
  </li>
  <li>
    <p>Fill up your 2FA and Submit.</p>
  </li>
</ol>

<p>Now you will see List of public Keys in your account.
We will leave this for now and retrieve them from our CLI/shell.
<img src="assets/img/posts/4b7ea49059630d1ed0c79f2c148753d0.webp" alt="GitHub showing list of saved public SSH keys in the account" /></p>

<h2 id="accessing-the-public-key">Accessing The Public Key</h2>

<p>Now just like almost everything in life there are multiple ways we can do this.</p>

<ol>
  <li>Manual Method</li>
  <li>Automatic Method</li>
</ol>

<h3 id="manual-method">Manual Method</h3>

<p>This is the method where we simply copy and paste our public key into a file.</p>

<ol>
  <li>Copy the content of <code class="language-plaintext highlighter-rouge">id_25519.pub</code></li>
  <li>Paste it in <code class="language-plaintext highlighter-rouge">~/.ssh/authorized_keys</code> and save it.</li>
  <li>Check Permission of the <code class="language-plaintext highlighter-rouge">authorized_keys</code> or just change it from command
<code class="language-plaintext highlighter-rouge">chmod 644 ~/.ssh/id_25519.pub</code>.</li>
  <li>Done.</li>
</ol>

<p>Now this method is not much of a task on itself if you want to do once or not store public key in some Publicly accessible repo itself. But there is better way we can do it and integrates perfectly and seamlessly with any workflow.</p>

<h3 id="automatic-method">Automatic Method</h3>

<p>Given you have to go through setup process but just like any automation once you set it. All you need is One command line. And it will retrieve your Public SSH key and make your machine accessible by you.</p>

<p><code class="language-plaintext highlighter-rouge">ssh-import-id-gh github-username</code></p>

<p>That’s it that’s all you need.
Copy this command, change it to the <code class="language-plaintext highlighter-rouge">github-username</code> you saved your public key to and done.</p>

<p>Now you can access your Machine.</p>

<blockquote class="prompt-tip">
  <p>If your private key is compromised in anyway remove this newly added line from <code class="language-plaintext highlighter-rouge">authorized_keys</code>.</p>
</blockquote>]]></content><author><name></name></author><category term="Homelab" /><category term="ssh" /><category term="linux" /><category term="github" /><category term="homelab" /><category term="security" /><category term="keygen" /><category term="ed25519" /><summary type="html"><![CDATA[Store your SSH public keys on GitHub and provision any new Linux server with one command using ssh-import-id-gh. No manual key copying needed.]]></summary><media:thumbnail xmlns:media="http://search.yahoo.com/mrss/" url="https://ashishghimire.com/assets/img/headers/githubssh.webp" /><media:content medium="image" url="https://ashishghimire.com/assets/img/headers/githubssh.webp" xmlns:media="http://search.yahoo.com/mrss/" /></entry><entry><title type="html">Installing Proxmox and Post Installation</title><link href="https://ashishghimire.com/posts/Install-Proxmox-And-Post-Installation/" rel="alternate" type="text/html" title="Installing Proxmox and Post Installation" /><published>2025-07-23T23:32:00+10:00</published><updated>2026-04-11T17:39:25+10:00</updated><id>https://ashishghimire.com/posts/Install-Proxmox-And-Post-Installation</id><content type="html" xml:base="https://ashishghimire.com/posts/Install-Proxmox-And-Post-Installation/"><![CDATA[<p>Its 2025 most of us have a spare piece of Desktop or Laptop lying around, which seems like is not worth much. But using Proxmox that piece of old tech can make your life easier without a lot of trouble. You will not need a brand new unique system to run a server. Any PC should be fine after 2010, check specs for PCs that are older than 2010.</p>

<p>We will be Making a Bootable USB, Installing Proxmox and Setting up Post Installation process.</p>
<h2 id="prerequisite">Prerequisite</h2>

<h3 id="hardware">Hardware</h3>
<ul>
  <li>USB Stick</li>
  <li>A Computer / Laptop to make USB Bootable</li>
  <li>Another Computer as Server</li>
  <li>WI-FI or A Lan Cable to connect Server to Router
    <h3 id="software">Software</h3>
  </li>
  <li>Balena Etcher
    <h3 id="network">Network</h3>
  </li>
  <li>IP Gateway (Router IP) Address and Subnet, Usually 192.168.x.x/24
    <h2 id="pre-installation">Pre-Installation</h2>
  </li>
</ul>

<p>Before Installing Proxmox we have to make a bootable USB drive. And our system ready to boot from USB.</p>
<h3 id="prepare-usb">Prepare USB</h3>

<ol>
  <li>Download Proxmox VE from <a href="https://www.proxmox.com/en/downloads">Official Proxmox Site</a></li>
  <li>Download Balena Etcher from <a href="https://etcher.balena.io/#download-etcher">Balena Etcher Official Site</a></li>
  <li>
    <p>Flash Downloaded ISO file to USB
 <img src="assets/img/posts/32f9acc76a1be3de7e31a35a982a72ed.webp" alt="Balena Etcher - select image step" /><img src="assets/img/posts/495f48066f7746da167a1cc311ee3751.webp" alt="Balena Etcher - select target USB drive" /><img src="assets/img/posts/7f265173d015846a32ed68043a6b3f45.webp" alt="Balena Etcher - flashing in progress" /><img src="assets/img/posts/432cdecf0490211bfdc00f40b3197769.webp" alt="Balena Etcher - flash complete" /></p>

    <blockquote>
      <div class="language-plaintext highlighter-rouge"><div class="highlight"><pre class="highlight"><code><table class="rouge-table"><tbody><tr><td class="rouge-gutter gl"><pre class="lineno">1
</pre></td><td class="rouge-code"><pre>⚠️ Make sure you select right device
</pre></td></tr></tbody></table></code></pre></div>      </div>
    </blockquote>
  </li>
  <li>Select Yes on Windows Prompt.</li>
  <li>Let it Flash.</li>
  <li>Done</li>
</ol>

<h3 id="bios-settings">BIOS Settings</h3>

<ol>
  <li>Connect your USB</li>
  <li>Start/Restart this machine.</li>
  <li>During Boot, open BIOS/UEFI settings using <code class="language-plaintext highlighter-rouge">F8</code> or <code class="language-plaintext highlighter-rouge">DEL</code> key.</li>
  <li>Now look for Boot Order. Look for Boot option on top.</li>
  <li>Select your USB as boot device.</li>
  <li>Now this will boot to Proxmox Installation.</li>
</ol>

<blockquote class="prompt-tip">
  <p>Boot Configuration GUI varies with motherboard manufacturer. Please look for your specific Motherboard Bios settings in the internet.</p>
</blockquote>

<h2 id="installation">Installation</h2>

<p>During installation you will be prompted with the steps below. Here I have highlighted the selection with <mark style="background: #BBFABBA6;">Green</mark> and things to consider on <mark style="background: #D2B3FFA6;">Purple</mark></p>

<ol>
  <li>Select Install Proxmox  VE (Graphical)
 <img src="assets/img/posts/4a47a0db6e60853dedfcfdf08a5ca249.webp" alt="Proxmox installer boot screen with Install Proxmox VE Graphical option selected" /></li>
  <li>Read The EULA and Agree (Mandatory for Installation)
 <img src="assets/img/posts/fb5c81ed3a220004b71069645f112867.webp" alt="Proxmox EULA license agreement screen" /></li>
  <li>Make sure you select the correct Disk here, one way to see correct disk is Size of the disk. But if you have only one disk you can go next as it will be default.
 <img src="assets/img/posts/10fb15c77258a991b0028080a64fb42d.webp" alt="Proxmox target disk selection screen" /></li>
  <li>Make sure you select your correct Location and Time Zone here.
 <img src="assets/img/posts/09dd8c2662b96ce14928333f055c5580.webp" alt="Proxmox location and timezone configuration screen" /></li>
  <li>Write your desired password, Make sure you remember it and it complies with the policy highlighted in purple.
 <img src="assets/img/posts/8266e4bfeda1bd42d8f9794eb4ea0a13.webp" alt="Proxmox password and email setup screen" /></li>
  <li>⚠️ Network is arguably most important section here because once its set up, we will be accessing Proxmox only through web.
 <img src="assets/img/posts/f19c9085129709ee14d013be869df69b.webp" alt="Proxmox network configuration screen showing static IP, gateway, and DNS fields" />
    <ol>
      <li>IP Address (CIDR): This is where you allocate your static IP so it does not change in future and mess up with settings. Its borderline mandatory to have static IP. If you have Ethernet connected your Router will allocate an IP , change it. Personally i recommend changing last bits over 100 and leave subnet to 24.</li>
      <li>Gateway : Router IP (Usually prefilled)</li>
      <li>DNS Server: Router IP. I recommend router IP so if i change my DNS in my router its global for all devices in LAN. You can also opt to <code class="language-plaintext highlighter-rouge">1.1.1.1</code> for Cloudflare or <code class="language-plaintext highlighter-rouge">8.8.8.8</code> for Google’s DNS server.
        <blockquote>
          <p>💡 All of the Network settings can be changed later too. These settings make sure we have Initial Network Access.</p>
        </blockquote>
      </li>
    </ol>
  </li>
  <li>Summary: Final summary of all our configuration before we proceed with Installation.
 <img src="assets/img/posts/9eb9cd58b9ea5e04c890326b5c1f471f.webp" alt="Proxmox installation summary review screen before proceeding" /></li>
  <li>After clicking Install it will take a couple of minutes to finish Installation and reboot Automatically.
 <img src="assets/img/posts/602e8f042f463dc47ebfdf6a94ed5a6d.webp" alt="Proxmox installation progress bar" /></li>
  <li>After Reboot Select First option i.e. “Proxmox VE GNU/Linux” and Enter.
 <img src="assets/img/posts/7afbb1602613ec52b265d7a54ad27330.webp" alt="Proxmox VE GNU/Linux boot menu after installation" /></li>
  <li>You will see Your IP and Port 8006 on the top. Yours will be different from mine. This is how we will access the web app and carry on from. Now you can remove monitor from proxmox server and move it to its designated area and will barely need to touch the hardware. Power and LAN is important and that’s all we need.
<img src="assets/img/posts/586e508f161f26ce94633729ac56c602.webp" alt="Proxmox terminal showing web UI URL and port 8006 after first boot" /></li>
</ol>

<h2 id="first-access-and-post-installation">First Access and Post Installation</h2>

<ol>
  <li>Go to the given URL on your browser.</li>
  <li>Since its self signed Certificate it will warn you. Accept the risk and continue.</li>
  <li>Now for username <code class="language-plaintext highlighter-rouge">root</code> and <code class="language-plaintext highlighter-rouge">password</code> is what we set during installation.</li>
  <li>Once we login we will be prompted A subscription message. Click OK.</li>
</ol>

<h3 id="post-installation-and-scripts">Post Installation and Scripts</h3>

<p>Here comes the magic of Proxmox Community. Proxmox is an open source software with a huge community behind it. The project “Proxmox VE Helper-Scripts” was started by a user who went by name “<a href="https://github.com/tteck/">Tteck</a>” . He sadly passed away and the scripts are maintained by community in a <a href="https://github.com/community-scripts/ProxmoxVE">community github repo</a>  and can be accessed at https://community-scripts.github.io/ProxmoxVE/ .</p>

<p>We will be using “<a href="https://community-scripts.github.io/ProxmoxVE/scripts?id=post-pve-install">Proxmox VE Post Install</a>” Script. This script will updates our proxmox, disables bunch of features which are redundant in our use case and also modifies repos. Apart from that it also disables “Subscription Nag” , that ok option every time you have to hit when you open it up.</p>

<p>This is strongly recommended to run Immediately after Installation.</p>

<ol>
  <li>Below Datacenter Click on pve.
<img src="assets/img/posts/c51eb0ec190e11157de0e0ee756c9353.webp" alt="Proxmox web UI showing pve node selected under Datacenter in the left sidebar" /></li>
  <li>On top right you will see <code class="language-plaintext highlighter-rouge">shell</code>.
 <img src="assets/img/posts/ae0590af5df5d22044ceda3914c21023.webp" alt="Proxmox web UI top-right area with Shell button highlighted" /></li>
  <li>Clicking <code class="language-plaintext highlighter-rouge">shell</code> will open a web shell where you can run the script.
 <img src="assets/img/posts/0a3854aabd6e78c94df808f5c890b0d8.webp" alt="Proxmox web shell terminal window open and ready for commands" /></li>
  <li>Now either paste the script below or get it directly from “<a href="https://community-scripts.github.io/ProxmoxVE/scripts?id=post-pve-install">Helper Script Website</a>”
 <img src="assets/img/posts/c8091a8d715fbb5703085555e24ea8e3.webp" alt="Post-install community script being pasted into Proxmox web shell" /></li>
  <li>Now it is recommended to select Yes on all prompts.
 <img src="assets/img/posts/5ce32cbb4a3d03d02d573efe6ef7ab3f.webp" alt="Post-install script prompts asking to select Yes for each option" /></li>
  <li>It will reboot and your system is ready for VM.
 <img src="assets/img/posts/ee9e1c5d50672f7367550cb8378b61c0.webp" alt="Post-install script complete, Proxmox rebooting and ready for VMs" /></li>
</ol>

<p>Now for further we will be installing VMs. Once Proxmox is up, a common next step is getting Docker running — see <a href="/posts/Install-Docker-And-Manage-Permission/">Installing Docker and Setting Permission</a>.</p>

<p>Welcome to HomeLab.</p>]]></content><author><name></name></author><category term="Homelab" /><category term="proxmox" /><category term="linux" /><category term="homelab" /><category term="virtualization" /><category term="selfhosted" /><category term="hypervisor" /><summary type="html"><![CDATA[How to install Proxmox VE on an old PC and run essential post-installation configuration using the Proxmox community helper scripts. Turn spare hardware into a home server.]]></summary><media:thumbnail xmlns:media="http://search.yahoo.com/mrss/" url="https://ashishghimire.com/assets/img/headers/proxmox.webp" /><media:content medium="image" url="https://ashishghimire.com/assets/img/headers/proxmox.webp" xmlns:media="http://search.yahoo.com/mrss/" /></entry><entry><title type="html">Installing Docker and Setting Permission</title><link href="https://ashishghimire.com/posts/Install-Docker-And-Manage-Permission/" rel="alternate" type="text/html" title="Installing Docker and Setting Permission" /><published>2025-07-06T00:11:31+10:00</published><updated>2026-04-11T22:10:17+10:00</updated><id>https://ashishghimire.com/posts/Install-Docker-And-Manage-Permission</id><content type="html" xml:base="https://ashishghimire.com/posts/Install-Docker-And-Manage-Permission/"><![CDATA[<p>Every server I set up eventually needs Docker. There are a few ways to install it. Snap is one option but I avoid it because it adds a lot of overhead and snap packages have caused me issues before. There is also the convenience script that pipes a shell script directly into bash from the internet, which I am not comfortable running on production machines.</p>

<p>The right way is the official apt repository method from Docker’s own documentation. It takes a couple of extra steps but you get the latest stable version from a verified source and full control over updates.</p>

<p>The permissions step at the end is important and most guides skip explaining why. By default Docker runs as root. Every <code class="language-plaintext highlighter-rouge">docker</code> command requires <code class="language-plaintext highlighter-rouge">sudo</code>. That gets tedious and causes permission errors when containers try to write files to bind mounts. Adding your user to the <code class="language-plaintext highlighter-rouge">docker</code> group means you run everything without sudo. Just make sure you trust who else is in that group since docker group access is effectively root access on the host.</p>

<h2 id="installing-docker">Installing Docker</h2>

<ol>
  <li>
    <p>Setup docker’s apt repo</p>

    <div class="language-bash highlighter-rouge"><div class="highlight"><pre class="highlight"><code><table class="rouge-table"><tbody><tr><td class="rouge-gutter gl"><pre class="lineno">1
2
3
4
5
6
7
8
9
10
</pre></td><td class="rouge-code"><pre> <span class="nb">sudo </span>apt-get update
 <span class="nb">sudo </span>apt-get <span class="nb">install </span>ca-certificates curl
 <span class="nb">sudo install</span> <span class="nt">-m</span> 0755 <span class="nt">-d</span> /etc/apt/keyrings
 <span class="nb">sudo </span>curl <span class="nt">-fsSL</span> https://download.docker.com/linux/ubuntu/gpg <span class="nt">-o</span> /etc/apt/keyrings/docker.asc
 <span class="nb">sudo chmod </span>a+r /etc/apt/keyrings/docker.asc
 <span class="nb">echo</span> <span class="se">\</span>
 <span class="s2">"deb [arch=</span><span class="si">$(</span>dpkg <span class="nt">--print-architecture</span><span class="si">)</span><span class="s2"> signed-by=/etc/apt/keyrings/docker.asc] https://download.docker.com/linux/ubuntu </span><span class="se">\</span><span class="s2">
 </span><span class="si">$(</span><span class="nb">.</span> /etc/os-release <span class="o">&amp;&amp;</span> <span class="nb">echo</span> <span class="s2">"</span><span class="nv">$VERSION_CODENAME</span><span class="s2">"</span><span class="si">)</span><span class="s2"> stable"</span> | <span class="se">\</span>
 <span class="nb">sudo tee</span> /etc/apt/sources.list.d/docker.list <span class="o">&gt;</span> /dev/null
 <span class="nb">sudo </span>apt-get update
</pre></td></tr></tbody></table></code></pre></div>    </div>
  </li>
  <li>
    <p>Install Latest Docker and its dependencies</p>

    <p><code class="language-plaintext highlighter-rouge">sudo apt-get install docker-ce docker-ce-cli containerd.io docker-buildx-plugin docker-compose-plugin</code></p>
  </li>
  <li>
    <p>Create Docker group (Most likely already created)</p>

    <p><code class="language-plaintext highlighter-rouge">sudo groupadd docker</code></p>
  </li>
  <li>
    <p>Add user to the group</p>

    <p><code class="language-plaintext highlighter-rouge">sudo usermod -aG docker $USER</code></p>
  </li>
  <li>
    <p>Logout and Log Back in or restart or ..</p>

    <p><code class="language-plaintext highlighter-rouge">newgrp docker</code></p>
  </li>
</ol>

<blockquote class="prompt-warning">
  <p>This will ensure you will not need to run “sudo” everytime you run docker and also fixes most Permission error.</p>
</blockquote>

<p>If you run into DNS issues inside containers after this setup, see <a href="/posts/Broken-Docker-DNS-Due-to-PiHole/">Broken Docker DNS Due to Pi-hole</a> — a common gotcha on systems that have previously run Pi-hole.</p>]]></content><author><name></name></author><category term="Homelab" /><category term="docker" /><category term="linux" /><category term="ubuntu" /><category term="containers" /><category term="homelab" /><category term="permissions" /><summary type="html"><![CDATA[How to install Docker on Linux using the official apt repository and configure user group permissions so you can run containers without sudo.]]></summary><media:thumbnail xmlns:media="http://search.yahoo.com/mrss/" url="https://ashishghimire.com/assets/img/headers/dockerInstall.webp" /><media:content medium="image" url="https://ashishghimire.com/assets/img/headers/dockerInstall.webp" xmlns:media="http://search.yahoo.com/mrss/" /></entry><entry><title type="html">Installing Arch Linux Hard Way</title><link href="https://ashishghimire.com/posts/Installing-Arch-Linux-Hard-Way/" rel="alternate" type="text/html" title="Installing Arch Linux Hard Way" /><published>2025-07-06T00:11:31+10:00</published><updated>2026-04-11T17:39:25+10:00</updated><id>https://ashishghimire.com/posts/Installing-Arch-Linux-Hard-Way</id><content type="html" xml:base="https://ashishghimire.com/posts/Installing-Arch-Linux-Hard-Way/"><![CDATA[<h2 id="before-installation">Before Installation</h2>

<ul>
  <li>Backup your data</li>
  <li>Download <a href="https://etcher.balena.io/">Balena Etcher</a> &amp; <a href="https://archlinux.org/download/">ISO of ARCH Linux</a></li>
  <li>Burn ISO to a USB</li>
  <li>Restart</li>
</ul>

<h2 id="boot">Boot</h2>

<ul>
  <li>Press DEL and load to BIOS mode</li>
  <li>Change Boot Priorities to USB</li>
  <li>Reboot</li>
</ul>

<h2 id="arch">ARCH</h2>

<ul>
  <li>
    <p>Load ‘Arch Linux Install Medium’</p>
  </li>
  <li>
    <p>Connect Your Arch to internet</p>

    <p><code class="language-plaintext highlighter-rouge">iwctl --passphrase "$WIFIPASSWORD" station wlan0 connect $WIFINAME</code></p>
  </li>
  <li>
    <p>ping 8.8.8.8</p>

    <ul>
      <li>If you get bytes back you are connected</li>
    </ul>
  </li>
  <li>
    <p>Check if you are on UEFI mode</p>

    <p><code class="language-plaintext highlighter-rouge">efivar -l</code></p>
  </li>
  <li>
    <p>List your disks (Remember your diskname you want to install Arch to)</p>

    <p><code class="language-plaintext highlighter-rouge">lsblk</code></p>
  </li>
</ul>

<blockquote>
  <p>for me its <em>sdc</em></p>
</blockquote>

<ul>
  <li>
    <p>Split up Partition and Prepare your Drive</p>

    <p><code class="language-plaintext highlighter-rouge">gdisk /dev/sdc</code></p>
  </li>
</ul>

<blockquote>
  <p>CHOOSE YOUR DRIVE CAREFULLY</p>
</blockquote>

<div class="language-plaintext highlighter-rouge"><div class="highlight"><pre class="highlight"><code><table class="rouge-table"><tbody><tr><td class="rouge-gutter gl"><pre class="lineno">1
2
3
4
</pre></td><td class="rouge-code"><pre>`x` for 'expert'
`z` for 'Zap'
"Y" to WIPE DISK
"Y" again to Confirm
</pre></td></tr></tbody></table></code></pre></div></div>

<h3 id="verify-partitions">Verify partitions</h3>

<p><code class="language-plaintext highlighter-rouge">lsblk</code></p>

<ul>
  <li>notice there is no partition on your disk</li>
</ul>

<h3 id="partitioning">Partitioning</h3>

<div class="language-plaintext highlighter-rouge"><div class="highlight"><pre class="highlight"><code><table class="rouge-table"><tbody><tr><td class="rouge-gutter gl"><pre class="lineno">1
</pre></td><td class="rouge-code"><pre>cgdisk /dev/sdc
</pre></td></tr></tbody></table></code></pre></div></div>

<ul>
  <li>Press any key to continue</li>
</ul>

<blockquote>
  <p>We are using cgdisk because its easier, relatively.</p>
</blockquote>

<ul>
  <li>Separate ROOT and HOME Partition
    <ul>
      <li>
        <p>Root Partition: Where all OS Files will be stored</p>
      </li>
      <li>
        <p>Home Partition: Where all General Files will be Stored</p>
      </li>
    </ul>
  </li>
</ul>

<h3 id="boot-partition">BOOT Partition</h3>
<ul>
  <li>Use your keyboard and highlight “NEW” press “ENTER”</li>
  <li>First Sector: (Default):  (leave Blank and press “ENTER”)</li>
  <li>Size in Sectors: 1024MiB
    <ul>
      <li>1 GB for Boot Drive</li>
    </ul>
  </li>
  <li>Hex Code for GUID: ‘EF00’</li>
  <li>Name your Drive: ‘boot’</li>
</ul>

<h3 id="swap-memory">SWAP MEMORY</h3>

<blockquote class="prompt-info">
  <p>When you run out of RAM this memory is used.
Make this regardless of your RAM Size</p>
</blockquote>

<ul>
  <li>Highlight  and go to BIG size ‘free space’ (probably 3rd option)</li>
  <li>“NEW” again</li>
  <li>First Sector: (Default):  (leave Blank and press “ENTER”)</li>
  <li>Size in Sectors: 16GiB
    <ul>
      <li>16 GB for SWAP Drive</li>
    </ul>
  </li>
  <li>Hex Code for GUID: ‘8200’</li>
  <li>Name your Drive: ‘swap’</li>
</ul>

<h3 id="root-partition">ROOT Partition</h3>
<ul>
  <li>Highlight  and go to BIG size ‘free space’ (probably last option)</li>
  <li>“NEW” again</li>
  <li>First Sector: (Default):  (leave Blank and press “ENTER”)</li>
  <li>Size in Sectors: 40GiB
    <ul>
      <li>40 GB for Root Drive</li>
    </ul>
  </li>
  <li>Hex Code for GUID: ‘8300’</li>
  <li>Name your Drive: ‘root’</li>
</ul>

<h3 id="home-partition">Home Partition</h3>
<ul>
  <li>Highlight  and go to BIG size ‘free space’ (probably last option)</li>
  <li>“NEW” again</li>
  <li>First Sector: (Default):  (leave Blank and press “ENTER”)</li>
  <li>Size in Sectors: (Default):  (leave Blank and press “ENTER”)</li>
  <li>Hex Code for GUID: ‘8300’</li>
  <li>Name your Drive: ‘home’</li>
</ul>

<h3 id="finishing-partitioning">FInishing Partitioning</h3>
<ul>
  <li>Use your arrows key to select “Write”</li>
  <li>Confirm with “yes”</li>
  <li>And arrows key to “Quit”</li>
  <li><code class="language-plaintext highlighter-rouge">clear</code></li>
</ul>

<h3 id="formatting-drives">Formatting Drives</h3>
<ul>
  <li><code class="language-plaintext highlighter-rouge">lsblk</code> to confirm drives again</li>
  <li><code class="language-plaintext highlighter-rouge">mkfs.fat -F32 /dev/sdc1</code>
    <blockquote>
      <p>File Allocation Table</p>
    </blockquote>
  </li>
  <li><code class="language-plaintext highlighter-rouge">mkswap /dev/sdc2</code>
    <blockquote>
      <p>To make swap format</p>
    </blockquote>
  </li>
  <li>
    <p><code class="language-plaintext highlighter-rouge">swapon /dev/sdc2</code></p>

    <p>Enable Swap</p>
  </li>
  <li>
    <p><code class="language-plaintext highlighter-rouge">mkfs.ext4 /dev/sdc3</code></p>

    <p>‘y’ to confirm if it asks</p>
  </li>
  <li><code class="language-plaintext highlighter-rouge">mkfs.ext4 /dev/sdc4</code>
    <blockquote class="prompt-tip">
      <p>Hint: press up arrow and change sdc3 to sdc4</p>
    </blockquote>
  </li>
</ul>

<h3 id="mounting-the-drives">Mounting the drives</h3>

<p><code class="language-plaintext highlighter-rouge">mount /dev/sdc3 /mnt</code></p>

<p><code class="language-plaintext highlighter-rouge">mkdir /mnt/boot</code></p>

<p><code class="language-plaintext highlighter-rouge">mkdir /mnt/home</code></p>

<p><code class="language-plaintext highlighter-rouge">mount /dev/sdc1 /mnt/boot</code></p>

<p><code class="language-plaintext highlighter-rouge">mount /dev/sdc4 /mnt/home</code></p>

<blockquote>
  <p>Basically we are making folder and structuring it with proper drives and partitions we made earlier.</p>
</blockquote>

<h3 id="update-mirrorlist">Update Mirrorlist</h3>

<p><code class="language-plaintext highlighter-rouge">cp /etc/pacman.d/mirrorlist /etc/pacman.d/mirrorlist.backup</code></p>

<blockquote>
  <p>We are just Backing up incase we mess something up.</p>
</blockquote>

<h3 id="rank-mirrors">Rank Mirrors</h3>

<blockquote>
  <p>This is to find Fastest mirror suitable to YOU.</p>
</blockquote>

<blockquote>
  <p>If you find error install rankmirrors</p>
</blockquote>

<p><code class="language-plaintext highlighter-rouge">sudo pacman -Sy pacman-contrib</code></p>

<p>Press Enter to confirm</p>

<p><code class="language-plaintext highlighter-rouge">rankmirrors -n 6 /etc/pacman.d/mirrorlist.backup &gt; /etc/pacman.d/mirrorlist</code></p>

<blockquote>
  <p>This will be working so system isn’t hang, Wait till it shows root@Archiso.</p>
</blockquote>

<blockquote>
  <p>What it did was found best mirrors and copied it to your mirrorlist</p>
</blockquote>

<p><code class="language-plaintext highlighter-rouge">cat /etc/pacman.d/mirrorlist</code></p>

<blockquote>
  <p>shows what we did earlier, so yeah ranked mirrorlist</p>
</blockquote>

<h3 id="installing-now">INSTALLING NOW</h3>

<p><code class="language-plaintext highlighter-rouge">pacstrap -K /mnt base linux linux-firmware base-devel</code></p>

<blockquote>
  <p>We are installing Base Linux.</p>
</blockquote>

<p><code class="language-plaintext highlighter-rouge">genfstab -U -p /mnt &gt;&gt; /mnt/etc/fstab</code></p>

<blockquote>
  <p>setup all the drives and structure so hard drive is recognized while booting</p>
</blockquote>

<h3 id="booting-into-installation">Booting into Installation</h3>

<p><code class="language-plaintext highlighter-rouge">arch-chroot /mnt</code></p>

<h3 id="install--nano-and-bash-completion">Install  ‘nano’ and ‘bash-completion’</h3>

<p><code class="language-plaintext highlighter-rouge">sudo pacman -S nano bash-completion</code></p>

<p>Enter to confirm</p>

<h3 id="enable-locales">Enable Locales</h3>

<p><code class="language-plaintext highlighter-rouge">nano /etc/locale.gen</code></p>

<ul>
  <li>Find your locale (for me its en_AU.UTF-8 UTF-8)</li>
  <li>remove # from its front</li>
  <li>hit ‘ctrl o’ and press enter to save</li>
  <li>hit ‘ctrl x’ to close</li>
</ul>

<p><code class="language-plaintext highlighter-rouge">locale-gen</code></p>

<p><code class="language-plaintext highlighter-rouge">echo LANG=en_AU.UTF-8 &gt; /etc/locale.conf</code></p>

<p><code class="language-plaintext highlighter-rouge">export LANG=en_AU.UTF-8</code></p>

<h3 id="timezone">TimeZone</h3>

<p><code class="language-plaintext highlighter-rouge">ls /usr/share/zoneinfo/</code></p>

<blockquote>
  <p>From here select your country and press tab</p>
</blockquote>

<blockquote>
  <p>It will list your Timezone</p>
</blockquote>

<blockquote>
  <p>write few characters of your TZ and press Tab</p>
</blockquote>

<p>Move to first part of your script and change, mine is Australia Sydney so i will be doing this:</p>

<p><code class="language-plaintext highlighter-rouge">ln -s /usr/share/zoneinfo/Australia/Sydney &gt; /etc/localtime</code></p>

<p><code class="language-plaintext highlighter-rouge">hwclock --systohc --utc</code></p>

<blockquote>
  <p>We are syncing time with BIOS time so Your PC has right time every time you open it.</p>
</blockquote>

<h3 id="hostname">Hostname</h3>

<p><code class="language-plaintext highlighter-rouge">echo archish &gt; /etc/hostname</code></p>

<blockquote class="prompt-tip">
  <p>instead of ‘archish’ use whatever name you want</p>
</blockquote>

<h3 id="if-you-have-ssd">IF YOU HAVE SSD</h3>

<p><code class="language-plaintext highlighter-rouge">systemctl enable fstrim.timer</code></p>

<ul>
  <li>Enable 32 bits packages</li>
</ul>

<p><code class="language-plaintext highlighter-rouge">nano /etc/pacman.conf</code></p>

<p>Go all the way down to [multilib] and remove # from both line</p>

<p><code class="language-plaintext highlighter-rouge">sudo pacman -Sy</code></p>

<h3 id="set-user-and-passwords">SET USER AND PASSWORDS</h3>
<ul>
  <li>
    <p>set root password</p>

    <p><code class="language-plaintext highlighter-rouge">passwd</code></p>
  </li>
</ul>

<blockquote class="prompt-danger">
  <p>Type password enter, it wont show it but its writing</p>
</blockquote>

<h3 id="add-user">Add User</h3>
<p><code class="language-plaintext highlighter-rouge">useradd -m -g users -G wheel,storage,power -s /bin/bash ghost</code></p>

<blockquote class="prompt-danger">
  <p>instead of ghost write your own username</p>
</blockquote>

<ul>
  <li>give that user password</li>
</ul>

<p><code class="language-plaintext highlighter-rouge">passwd ghost</code></p>

<p>Type password and enter.</p>

<h3 id="modify-sudo-file">Modify sudo file</h3>

<p><code class="language-plaintext highlighter-rouge">EDITOR=nano visudo</code></p>

<p>Opens sudo file</p>

<p>Search for %wheel</p>

<p>use ‘ctrl w’</p>

<p>find ‘%wheel ALL=(ALL:ALL)ALL’</p>

<p>Uncomment it (remove # from front)</p>

<h3 id="bootloader">BootLoader</h3>

<p><code class="language-plaintext highlighter-rouge">mount -t efivarfs efivarfs /sys/firmware/efi/efivars/</code></p>

<ul>
  <li>
    <p>Install bootloader</p>

    <p><code class="language-plaintext highlighter-rouge">bootctl install</code></p>
  </li>
  <li>
    <p>Write entries for boot loader</p>

    <p><code class="language-plaintext highlighter-rouge">nano /boot/loader/entries/arch.conf</code></p>
  </li>
</ul>

<p>Write the 3 lines</p>

<div class="language-bash highlighter-rouge"><div class="highlight"><pre class="highlight"><code><table class="rouge-table"><tbody><tr><td class="rouge-gutter gl"><pre class="lineno">1
2
3
</pre></td><td class="rouge-code"><pre>title ARCH
linux /vmlinuz-linux
initrd /initramfs-linux.img
</pre></td></tr></tbody></table></code></pre></div></div>

<blockquote>
  <p>save and exit (ctrl o and ctrl x)</p>
</blockquote>

<h3 id="point-to-your-harddrive">Point to your harddrive</h3>
<p><code class="language-plaintext highlighter-rouge">echo "options root=PARTUUID=$(blkid -s PARTUUID -o value /dev/sdc3) rw" &gt;&gt; /boot/loader/entries/arch.conf</code></p>

<blockquote>
  <p>This hardcode your UID of partition to your bootloader</p>
</blockquote>

<p><code class="language-plaintext highlighter-rouge">ip link</code></p>

<p>Know your network</p>

<h3 id="enable-dhcpcd">enable ‘dhcpcd’</h3>

<p><code class="language-plaintext highlighter-rouge">sudo pacman -S dhcpcd</code></p>

<p><code class="language-plaintext highlighter-rouge">sudo sydtemctl enable dhcpcd@wlan0.service</code></p>

<h3 id="install-networkmanager">install NetworkManager</h3>

<p><code class="language-plaintext highlighter-rouge">sudo pacman -S networkmanager</code></p>

<p><code class="language-plaintext highlighter-rouge">sudo systemctl enable NetworkManager.service</code></p>

<h3 id="install-linux-headers">install linux headers</h3>

<p><code class="language-plaintext highlighter-rouge">sudo pacman -S linux-headers</code></p>

<hr />

<h2 id="follow-only-if-you-have-gpu">Follow ONLY IF YOU HAVE GPU</h2>

<h3 id="nvidia">NVIDIA</h3>

<p><code class="language-plaintext highlighter-rouge">sudo pacman -S nvidia-dkms libglvnd nvidia-utils opencl-nvidia lib32-libglvnd lib32-nvidia-utils lib32-opencl-nvidia nvidia-settings</code></p>

<p><code class="language-plaintext highlighter-rouge">sudo nano /etc/mkinitcpio.conf</code></p>

<ul>
  <li>
    <p>Inside MODULE=() add these in exact order, it should look like this</p>

    <p><code class="language-plaintext highlighter-rouge">MODULES=(nvidia nvidia_modeset nvidia_uvm nvidia_drm)</code></p>
  </li>
  <li>
    <p>make sure they are loaded during boot time</p>

    <p><code class="language-plaintext highlighter-rouge">sudo nano /boot/loader/entries/arch.conf</code></p>
  </li>
  <li>
    <p>right after options line, after rw, in same line</p>

    <p><code class="language-plaintext highlighter-rouge">nvidia-drm.modeset=1</code></p>
  </li>
  <li>
    <p>Hook for pacman to update nvidia driver</p>

    <p><code class="language-plaintext highlighter-rouge">sudo mkdir /etc/pacman.d/hooks</code></p>

    <p><code class="language-plaintext highlighter-rouge">sudo nano /etc/pacman.d/hooks/nvidia.hook</code></p>

    <p>Add</p>
    <div class="language-bash highlighter-rouge"><div class="highlight"><pre class="highlight"><code><table class="rouge-table"><tbody><tr><td class="rouge-gutter gl"><pre class="lineno">1
2
3
4
5
6
7
8
9
10
11
</pre></td><td class="rouge-code"><pre>  <span class="o">[</span>Trigger]
  <span class="nv">Operation</span><span class="o">=</span>Install
  <span class="nv">Operation</span><span class="o">=</span>Upgrade
  <span class="nv">Operation</span><span class="o">=</span>Remove
  <span class="nv">Type</span><span class="o">=</span>Package
  <span class="nv">Target</span><span class="o">=</span>nvidia

  <span class="o">[</span>Action]
  <span class="nv">Depends</span><span class="o">=</span>mkinitcpio
  <span class="nv">When</span><span class="o">=</span>PostTransaction
  <span class="nv">Exec</span><span class="o">=</span>/usr/bin/mkinitcpio <span class="nt">-P</span>
</pre></td></tr></tbody></table></code></pre></div>    </div>
  </li>
</ul>

<hr />

<h2 id="else-continue">Else, Continue…</h2>

<p><code class="language-plaintext highlighter-rouge">exit</code></p>

<p><code class="language-plaintext highlighter-rouge">umount -R /mnt</code></p>

<p><code class="language-plaintext highlighter-rouge">reboot</code></p>

<blockquote>
  <p>You can plug out the USB</p>
</blockquote>

<p>When the system boots up, use your credentials to login.</p>

<h3 id="internet">Internet</h3>
<p>If you cannot connect to internet</p>

<p><code class="language-plaintext highlighter-rouge">nmtui</code></p>

<p>Activate a Connection and Connect</p>

<h3 id="install-x11-for-kde">Install x11 for KDE</h3>

<p><code class="language-plaintext highlighter-rouge">sudo pacman -S xorg-server xorg-apps xorg-xinit xorg-tvm xorg-xclock xterm</code></p>

<ul>
  <li>to test</li>
</ul>

<p><code class="language-plaintext highlighter-rouge">startx</code></p>

<p>if clocks shows up its installed, click any terminal u see and</p>

<p><code class="language-plaintext highlighter-rouge">exit</code></p>

<h2 id="install-plasma-or-any-desktop-environment-you-want">Install Plasma or Any Desktop Environment you want</h2>

<p><code class="language-plaintext highlighter-rouge">sudo pacman -S plasma sddm</code></p>

<ul>
  <li>enter password</li>
  <li>just keep entering Enter</li>
  <li>
    <p>Enable SDDM</p>

    <p><code class="language-plaintext highlighter-rouge">sudo systemctl sddm.service</code></p>
  </li>
</ul>

<p>REBOOT</p>

<blockquote class="prompt-tip">
  <p>This is straight method to install arch linux “hard way”. If you get any error or prefer different way, consult <a href="https://wiki.archlinux.org/title/Installation_guide">Arch Wiki Installation Guide</a>.</p>
</blockquote>]]></content><author><name></name></author><category term="Linux" /><category term="arch" /><category term="linux" /><category term="install" /><category term="bootloader" /><category term="kde" /><category term="plasma" /><category term="partitioning" /><summary type="html"><![CDATA[A step-by-step guide to installing Arch Linux manually — from disk partitioning and mounting to bootloader setup — without using the archinstall script.]]></summary><media:thumbnail xmlns:media="http://search.yahoo.com/mrss/" url="https://ashishghimire.com/assets/img/headers/ArchInstall.webp" /><media:content medium="image" url="https://ashishghimire.com/assets/img/headers/ArchInstall.webp" xmlns:media="http://search.yahoo.com/mrss/" /></entry></feed>